Quick Start
Unpack, pack, power on and off, use the emergency stop, configure the network, and charge Quanta X1 Pro.
This page describes the first-use procedure for Quanta X1 Pro. Before operating the robot, allow sufficient space and check the emergency stop and power supply status.
Quanta X1 Pro
Unpacking
Reference video (currently showing the carton packaging version):
-
Place the packaging box in an open, level area and make sure the locking casters at the bottom of the box are locked.

Packaging box and butterfly latch locations
-
Open the butterfly latches on the carton one by one and remove the outer carton. Lower the ramp board, then remove the white foam surrounding the robot.

Robot, ramp board, and foam locations
-
Connect the ramp board to the base of the box and remove the two wooden wheel chocks from under the robot's wheels. Hold the robot at the junction between the chassis and waist, and slowly push it forward so that it rolls down the ramp.

Wooden wheel chock locations under the robot's wheels
-
If the front of the robot is obstructed, slightly lift the front of the chassis to help it move. Do not lift or pull the robotic arms. As the robot moves down the ramp, also hold its shoulders to prevent it from tipping over.
Packing
-
Confirm that the robot is in the packing position and has been powered off.
-
Lock the casters on the base plate of the box. Have one person hold the robot at the junction between the chassis and waist and push it into the recess in the base plate.
-
Confirm that the robot has been pushed all the way in, then fit the foam padding, reinstall the outer carton, and fasten the white buckles in sequence.
-
Before carrying the robot up steps, power it off and have at least 4 people lift it together by supporting the chassis. Hands must support the metal structure underneath. Do not lift the outer casing or robotic arms.
Power On/Off
-
Check the emergency stop button on the robot body and confirm that it is released.
-
Press and hold the power button for 3 seconds to power on, then wait 2–3 minutes. A "click" indicates that the robot has completed power-on.
-
If startup fails, power off, wait 5 seconds, and try again.
-
Press and hold the power button for 3 seconds to power off. If the robot needs to be packed, first lower the body fully and return it to the packing position, then power it off.
Emergency Stop
In an emergency, immediately press the emergency stop button at the top rear of the robot body or the wireless emergency stop button, and hold the robot to prevent it from tipping over.

Quanta X1 Pro body emergency stop button
After confirming that the hazard has been eliminated, first power off the robot, then pull up the body emergency stop button or release the wireless emergency stop button, and finally power the robot back on.
Wi-Fi Network Configuration
Wi-Fi must be configured from the robot's desktop, not from a local page on the master arm station PC or a personal PC.
-
Access the robot's desktop through the remote desktop already configured on the robot, or by connecting a monitor, keyboard, and mouse directly to the robot.
-
Open a browser on the robot's desktop and enter:
http://localhost/Normally, the robot's WebUI opens the "Network Settings" page. If it does not open automatically, enter the following address directly:
http://localhost/robot/network -
On the "Wi-Fi Settings" page, click "Scan Wi-Fi List".
-
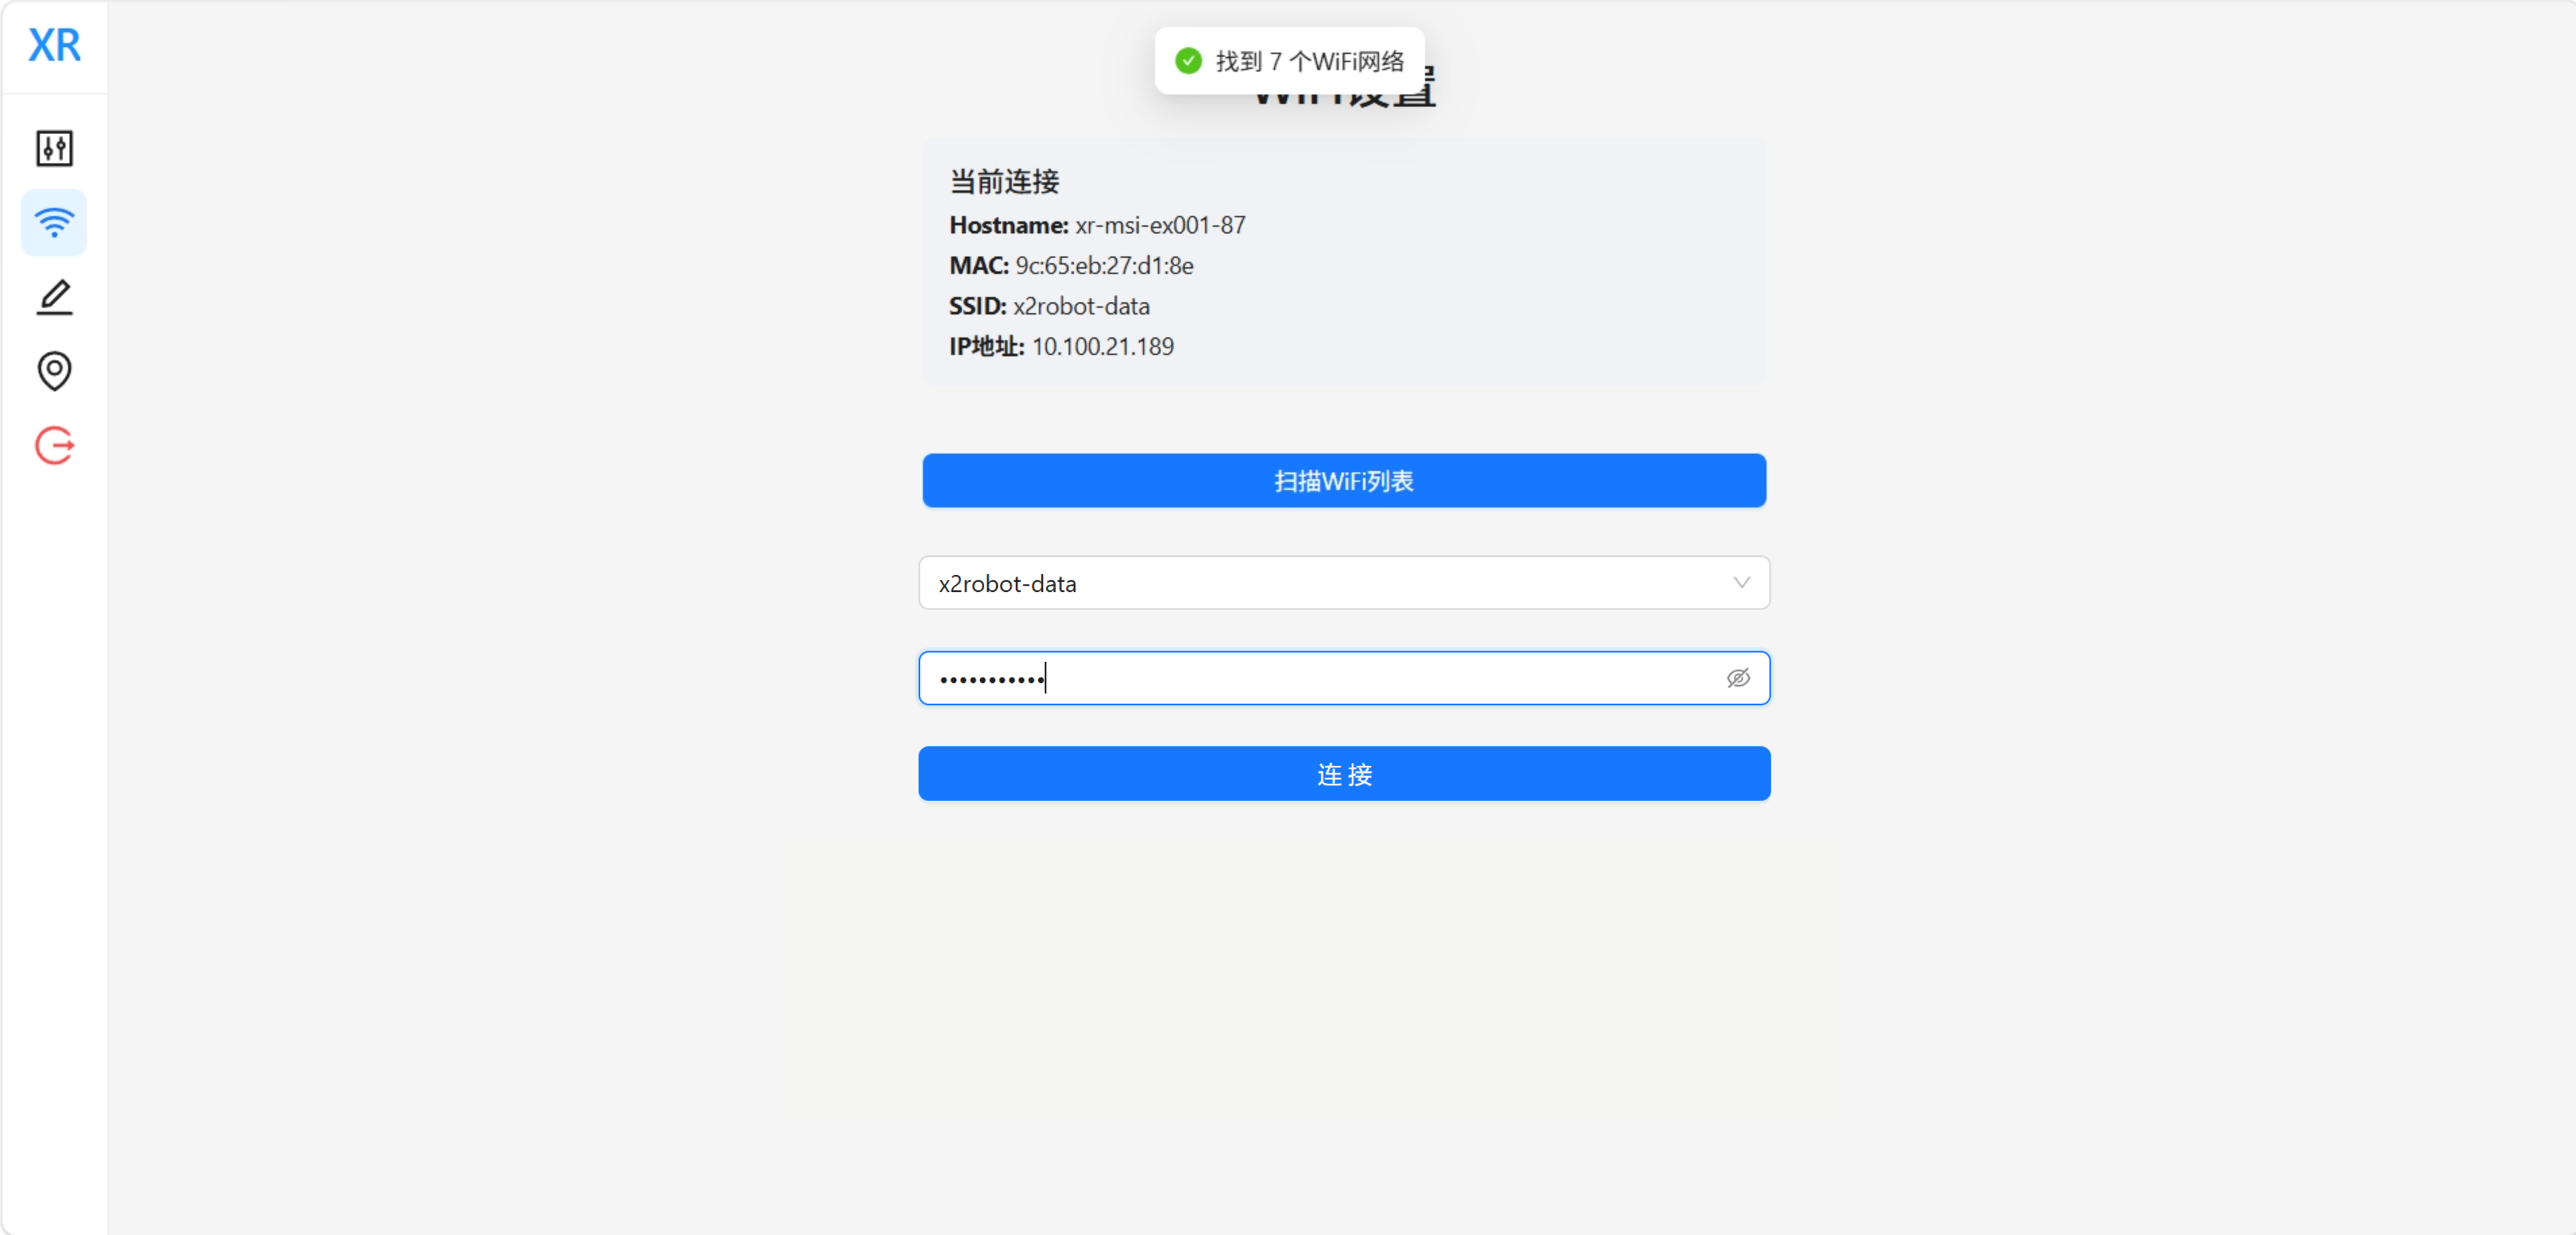
Select the Wi-Fi network you want to connect to, enter the correct password, and click "Connect".
-
Once connected, verify the SSID and IP address displayed on the page, and record the robot's current wireless IP address.
Note: localhost refers to the device currently running the browser, so the addresses above must be opened in a browser on the robot's desktop. Entering http://localhost/ on the master arm station PC opens the station's own WebUI, not the robot's network settings page. Entering this address on a personal PC likewise accesses only that PC.
The robot's IP address may change after switching Wi-Fi networks, and remote desktop or SSH connections may be temporarily interrupted. Before proceeding, confirm that you can reconnect to the robot through the new network.
Click the Wi-Fi icon in the list on the left to open the Wi-Fi settings interface.
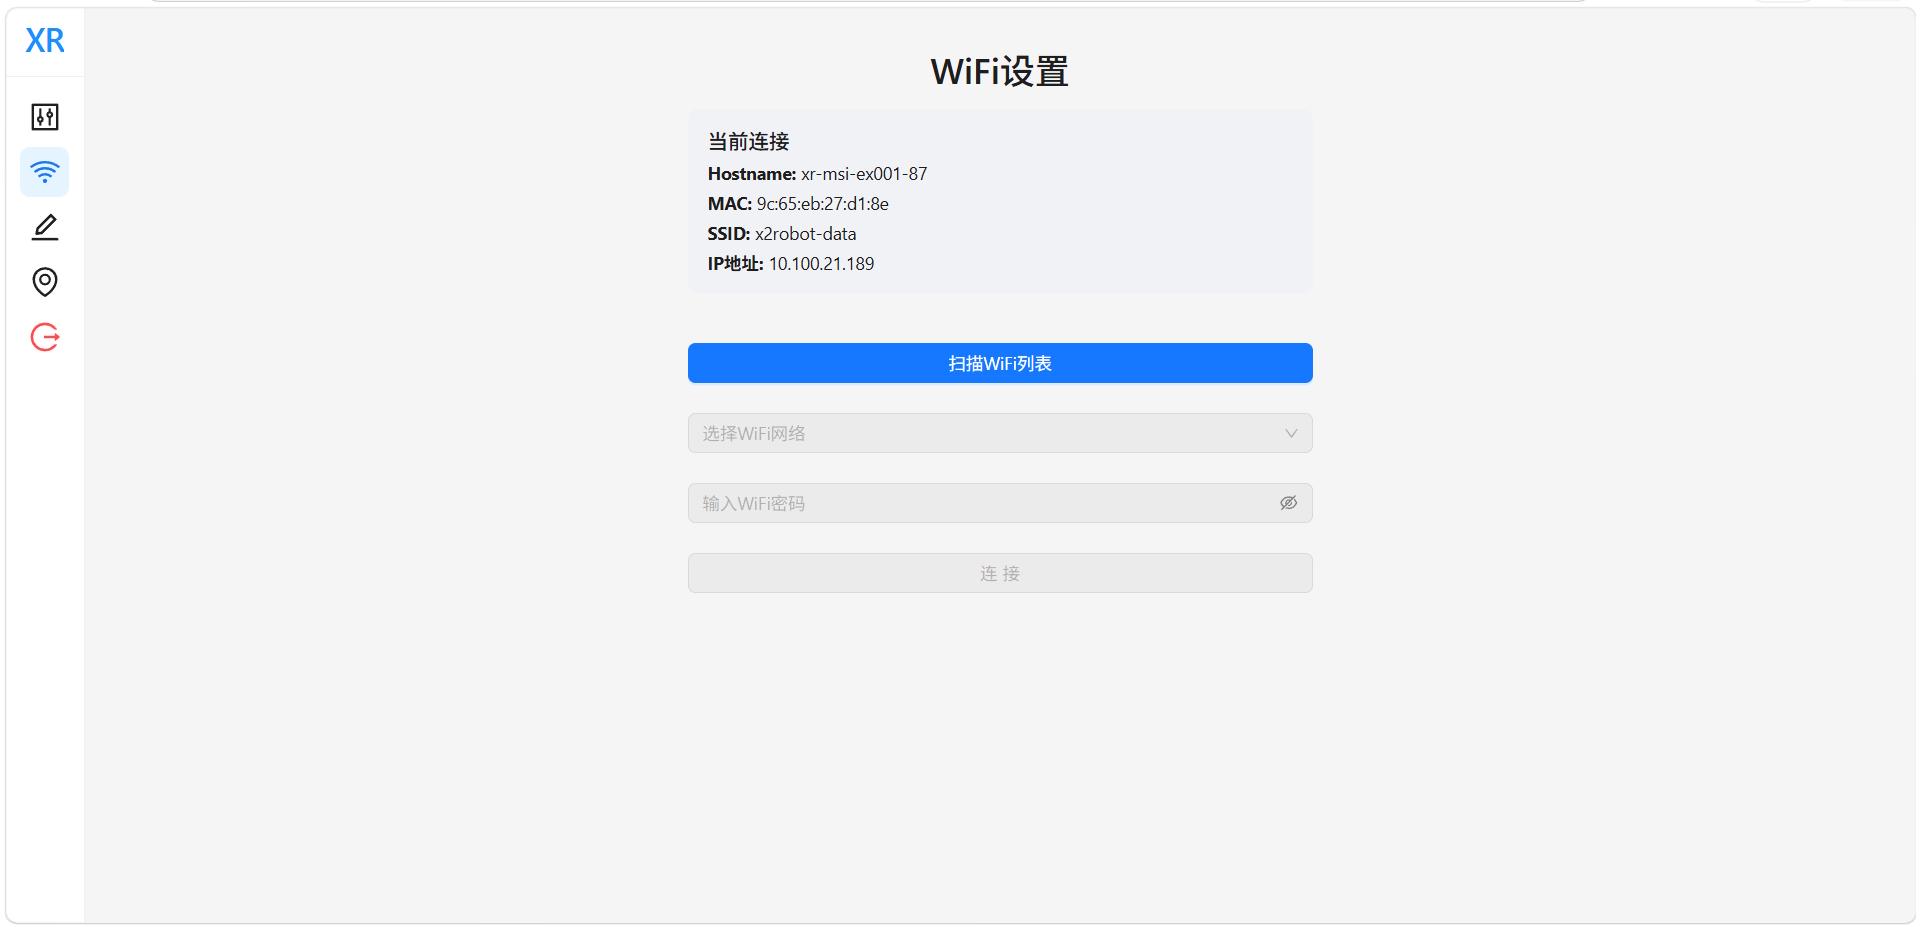
Click Scan Wi-Fi List to display the Wi-Fi networks currently available for connection
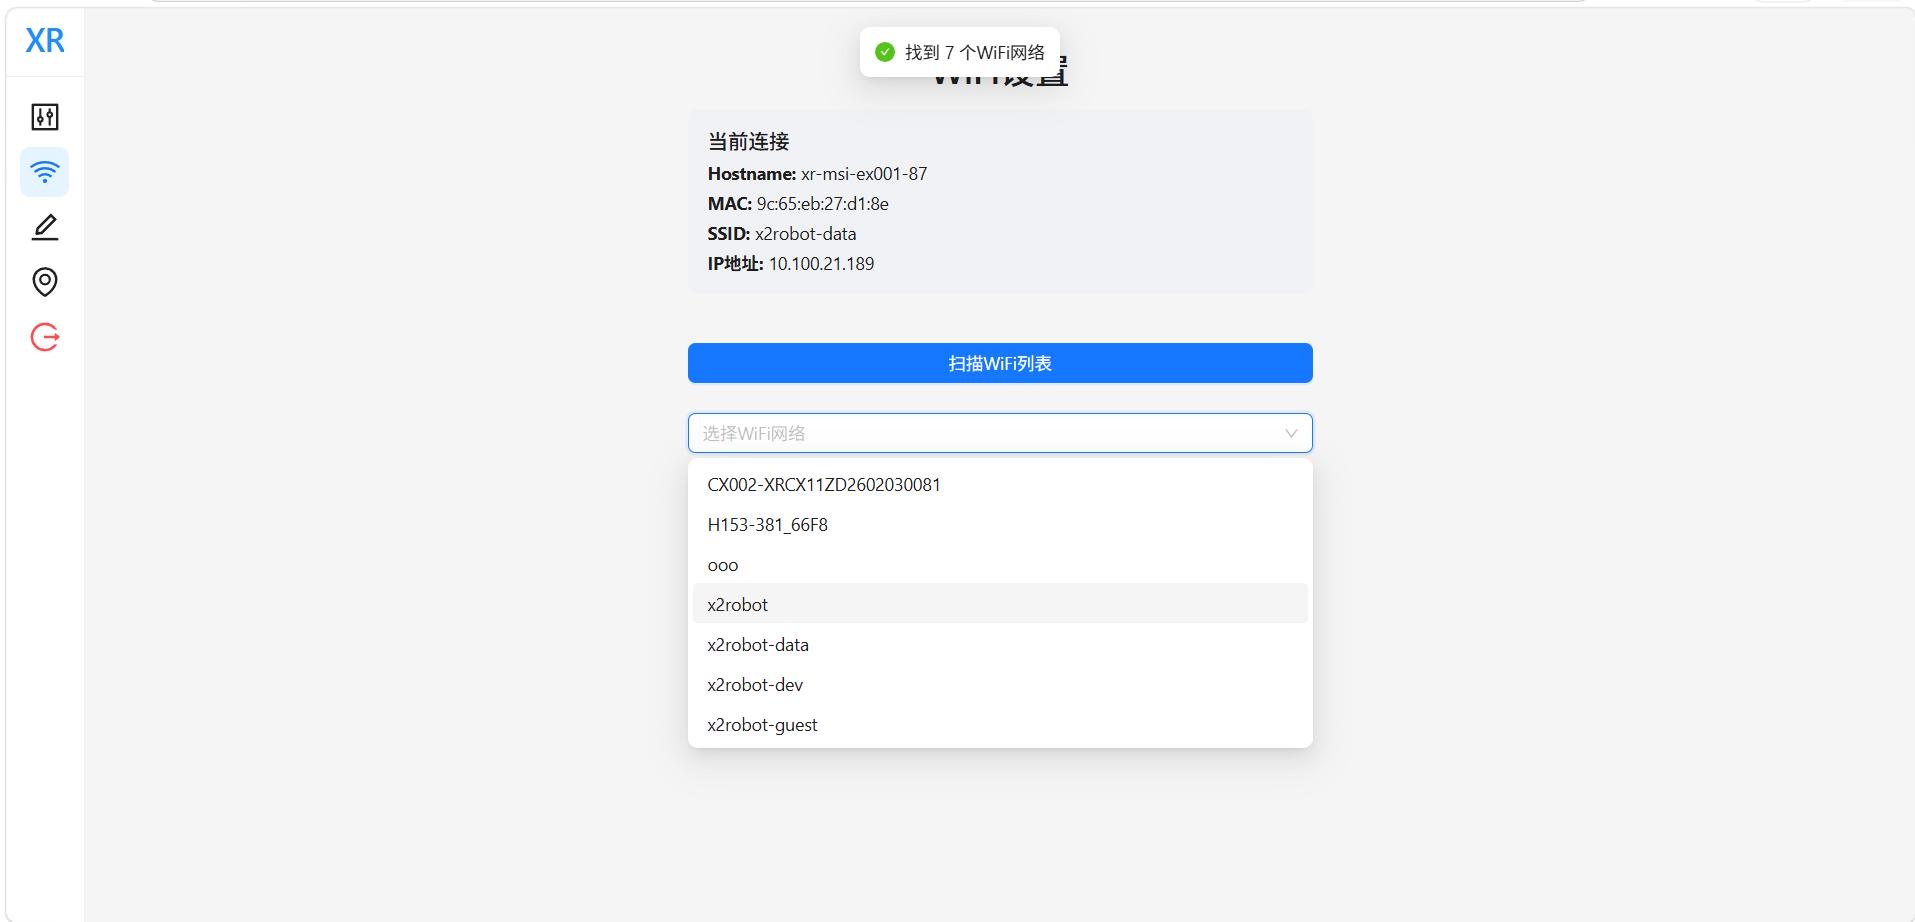
Select a suitable Wi-Fi network and enter the correct password to connect.
Charging Safety
Connect the standard power adapter to the robot's charging port. It supports 220–240 V mains power, and a full charge takes approximately 1 hour.
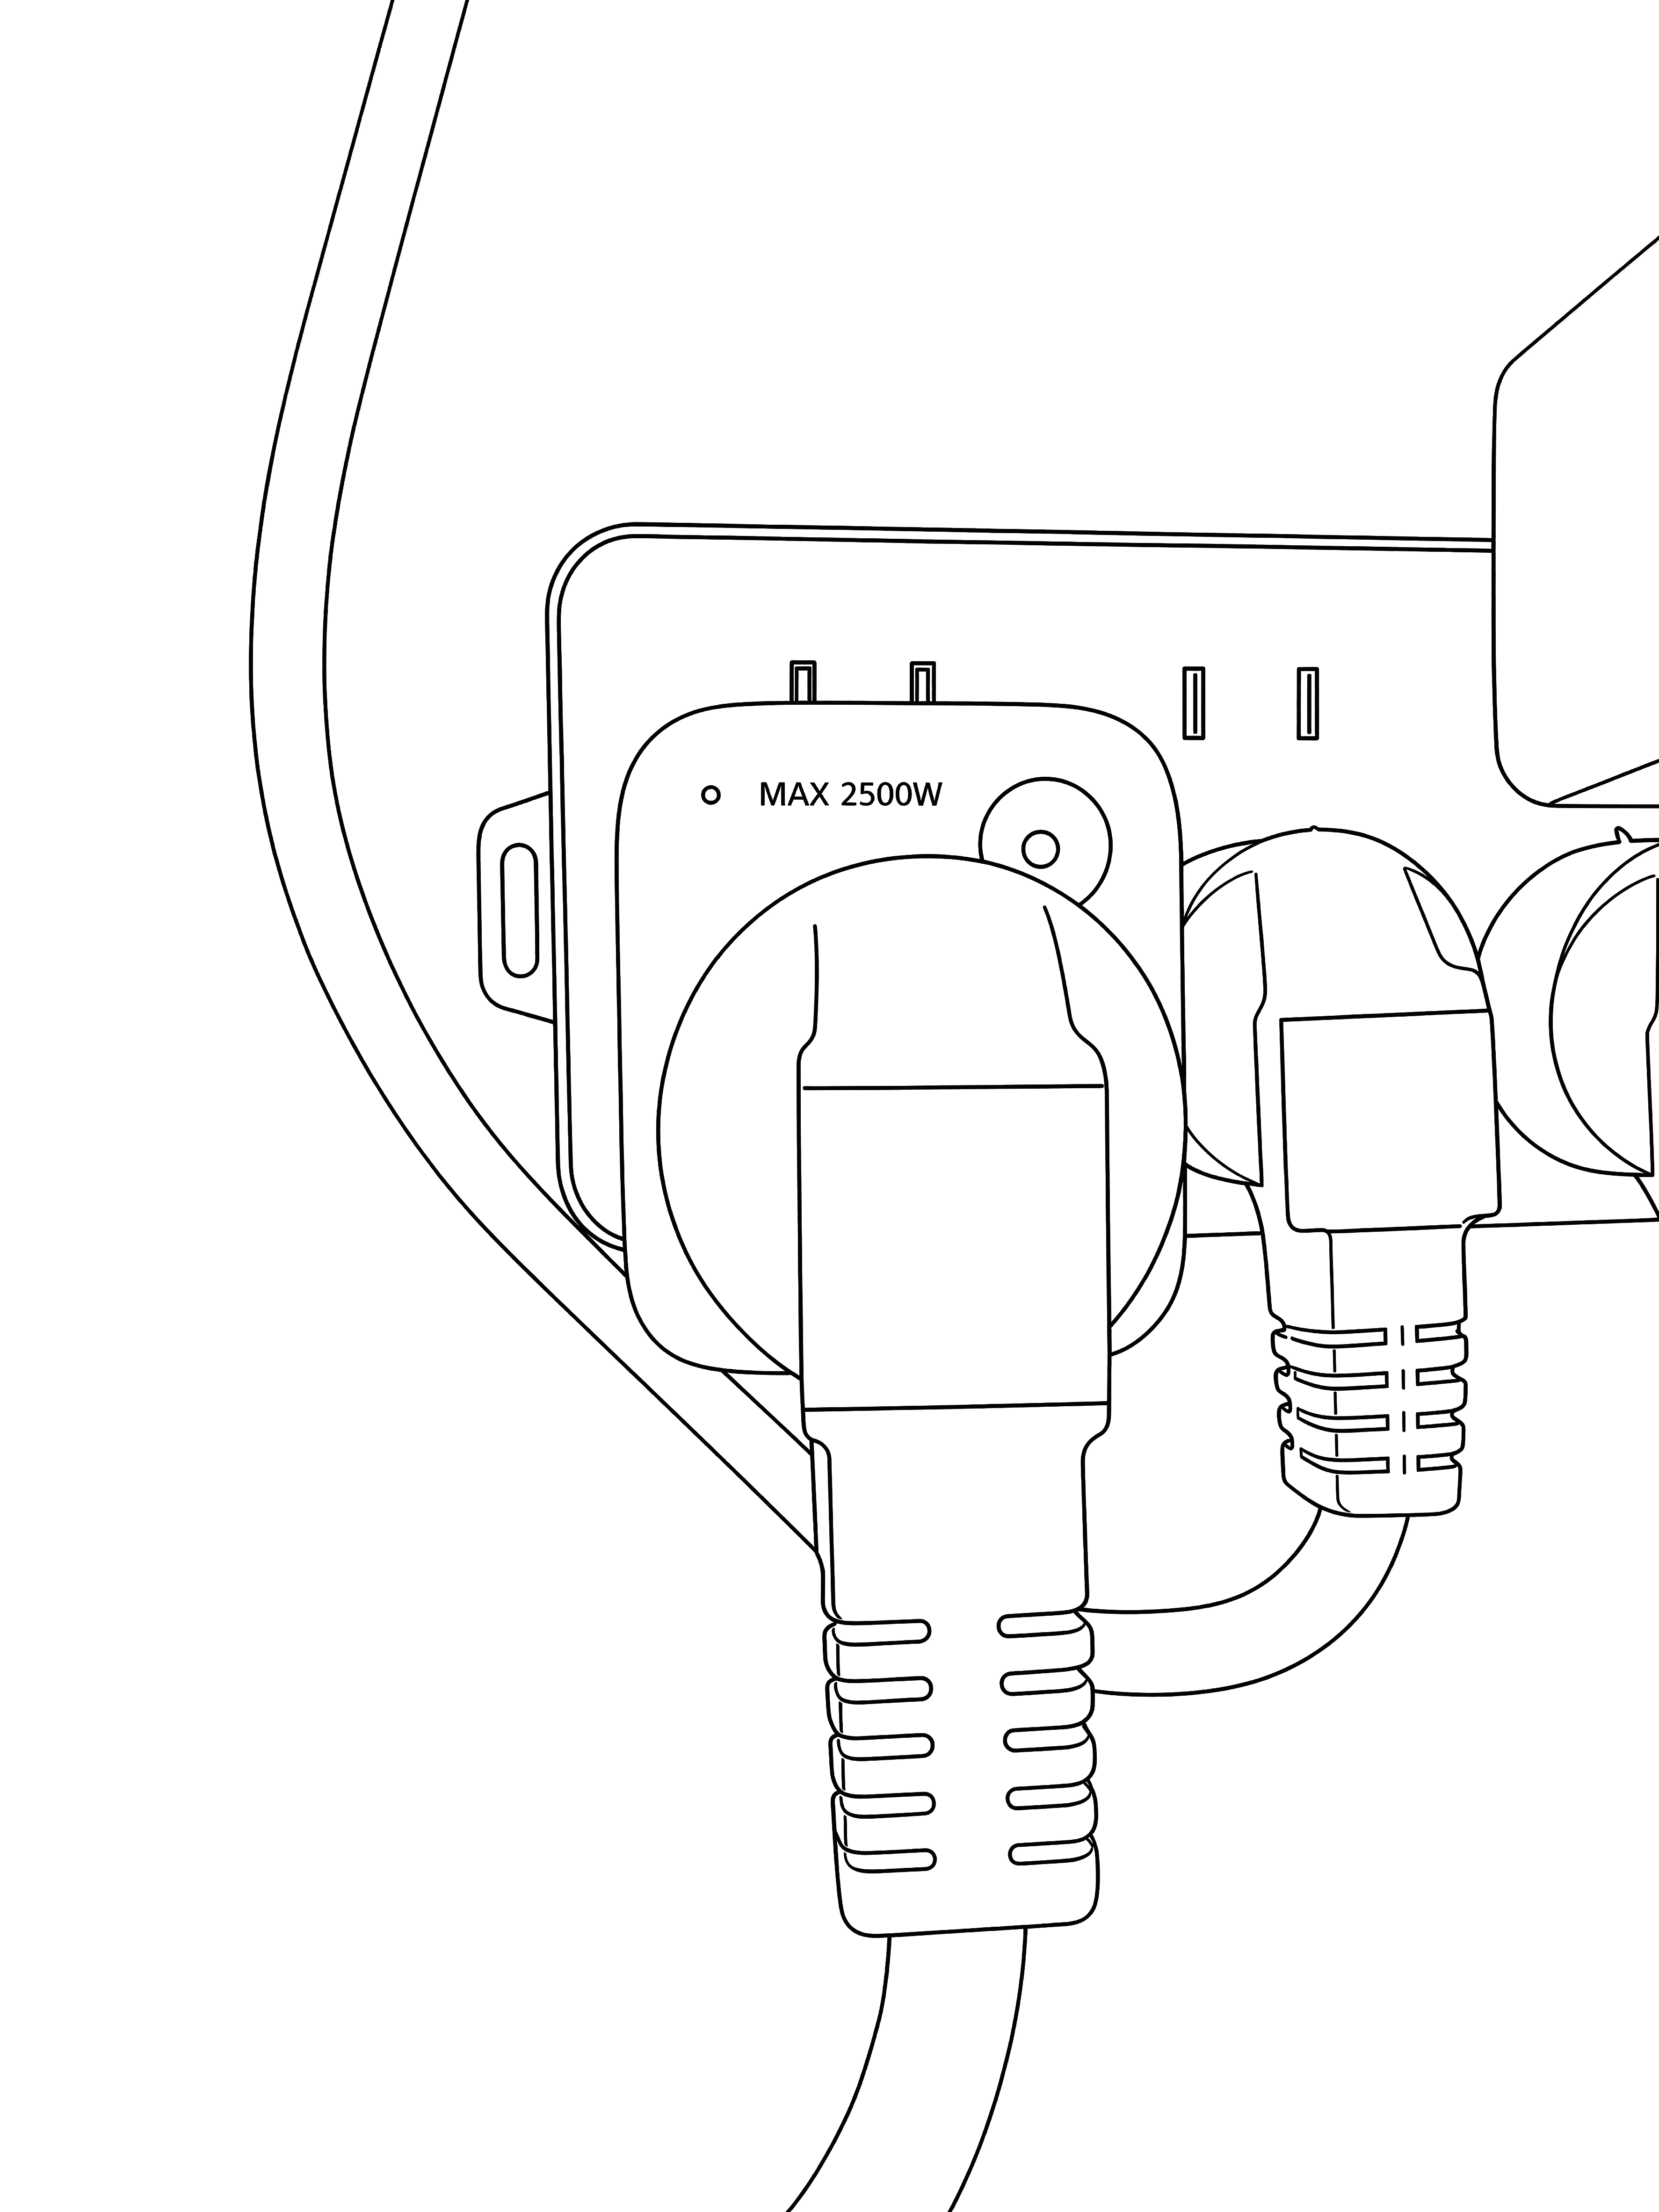
The power adapter uses a 16A three-pin plug, so a 16A-to-10A plug adapter is required to connect it to a socket.
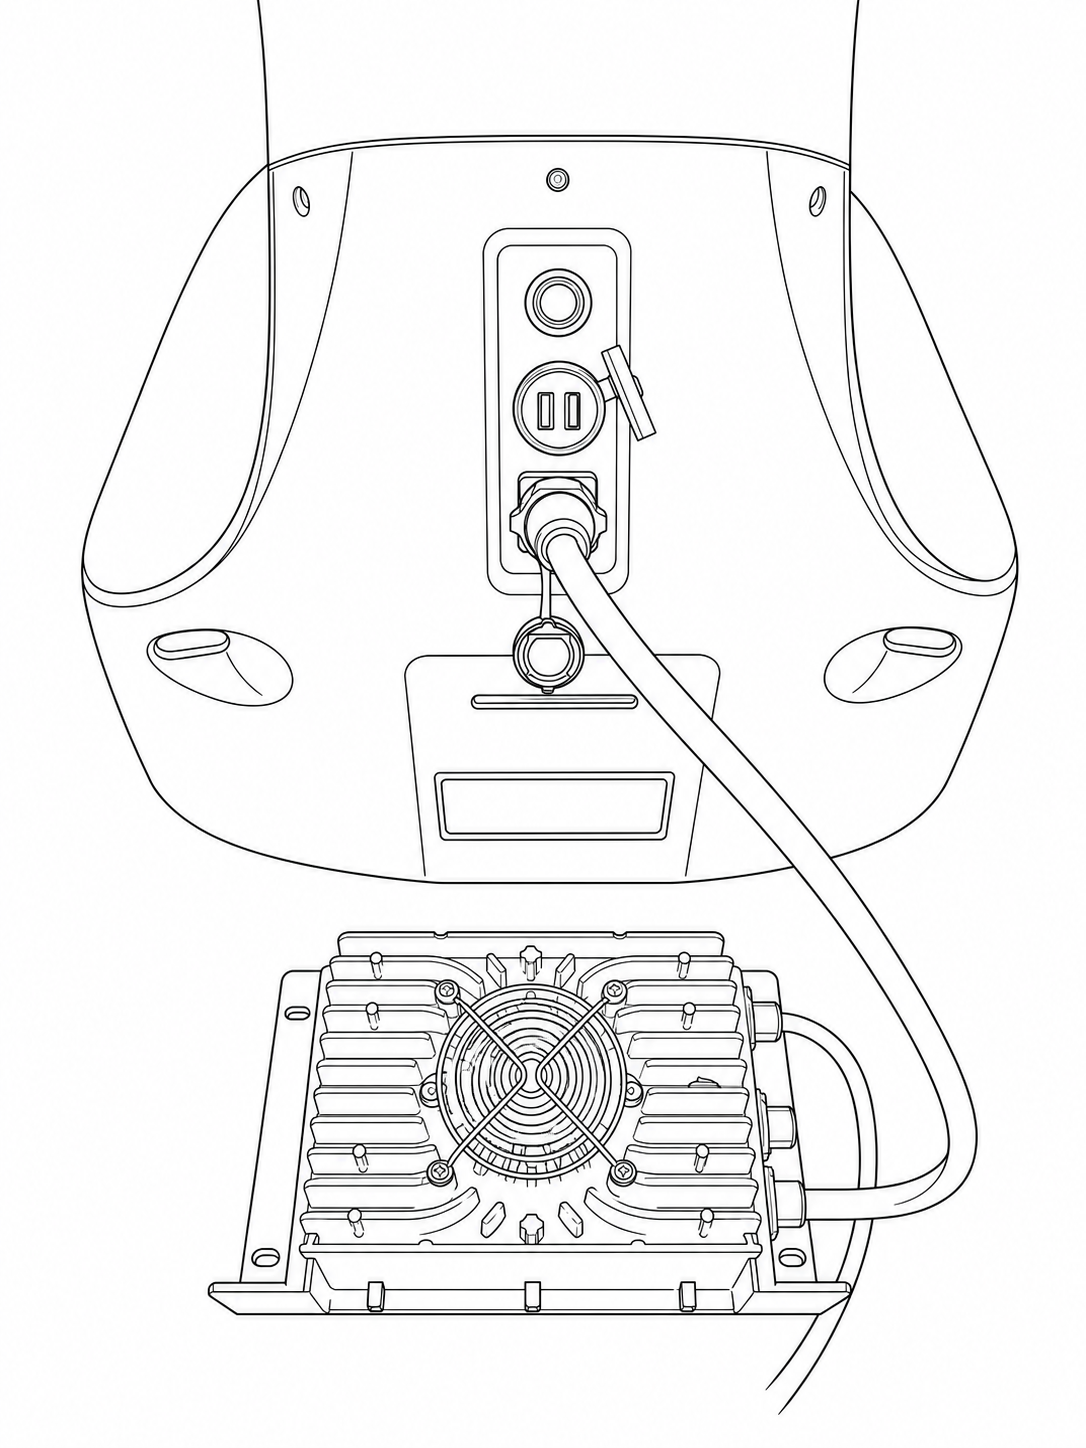
Note
Unplug when fully charged: Disconnect the power adapter promptly once the battery is fully charged to avoid battery damage from prolonged full charge.
Unplug when not in use: Unplugging the adapter from the socket when not charging is recommended to reduce standby risks.
Charging lock: Chassis movement is automatically disabled during charging and restored when charging is complete.