Quick Start
Environment Configuration
To install the Ubuntu and Python environments, please refer to the official documentation
-
For the installation method of Ubuntu 22.04 LTS, please refer to the official Ubuntu installation guide and official installation file download
-
Python Official Website
Disable Power-Saving Mode and Enable Balanced or Performance Mode
If your computer is in power-saving mode, data acquisition and recording may suffer from insufficient frame rates. Please ensure that balanced mode or performance mode is enabled
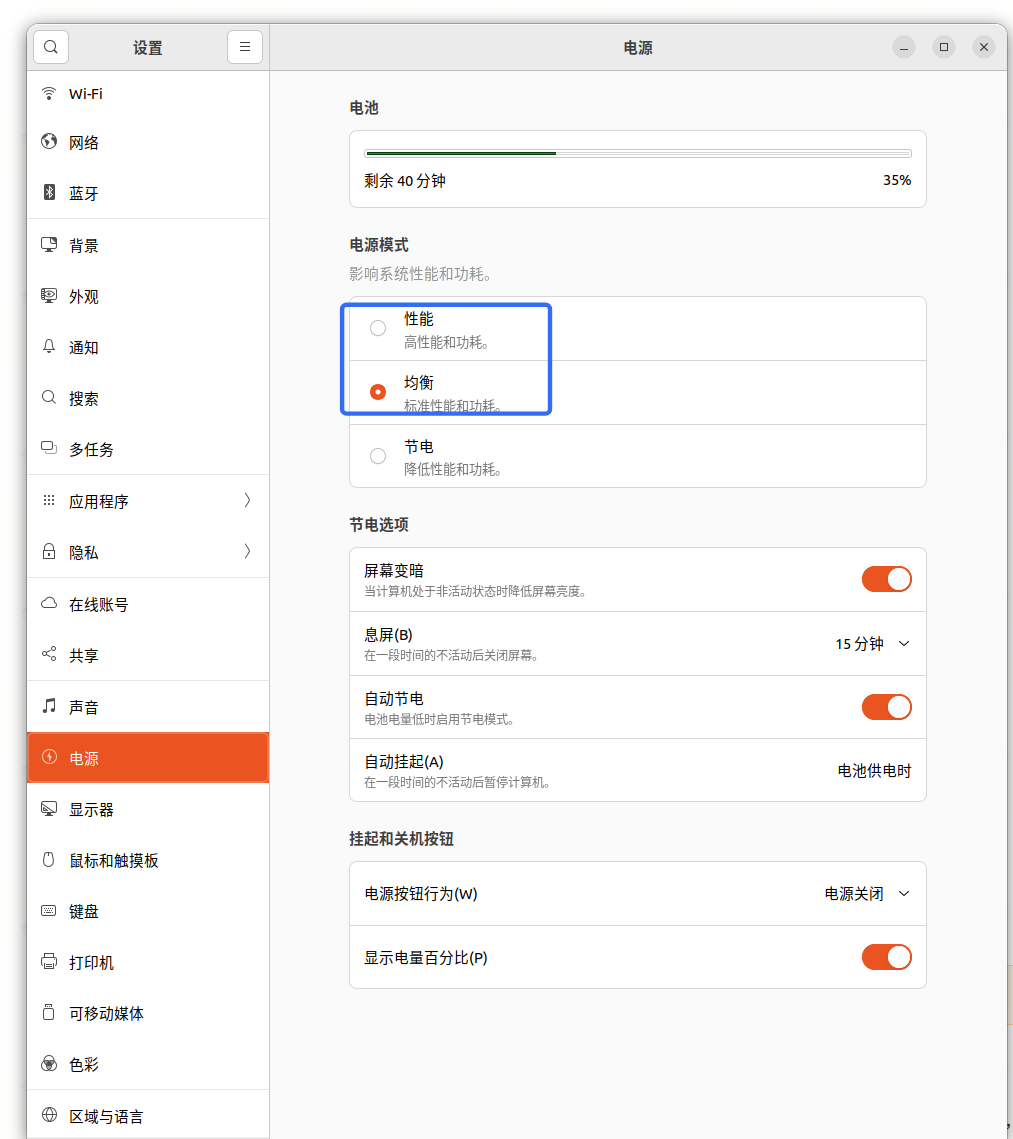
Alternatively, use the command line to enable performance mode
echo performance | sudo tee /sys/devices/system/cpu/cpu*/cpufreq/scaling_governorLAN Configuration Guide
Connect the Robot via Ethernet Cable
Connect the personal PC and the robot using an Ethernet cable
Configure the LAN IP of the Personal PC
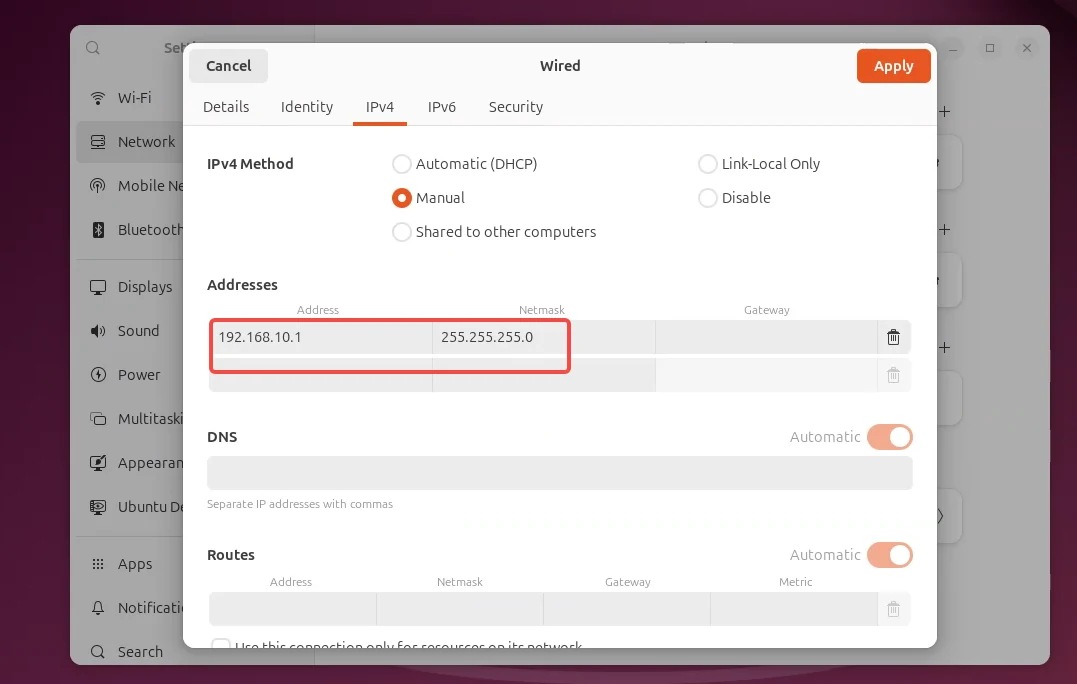
- Open Settings > Network > Wired configuration on the personal PC
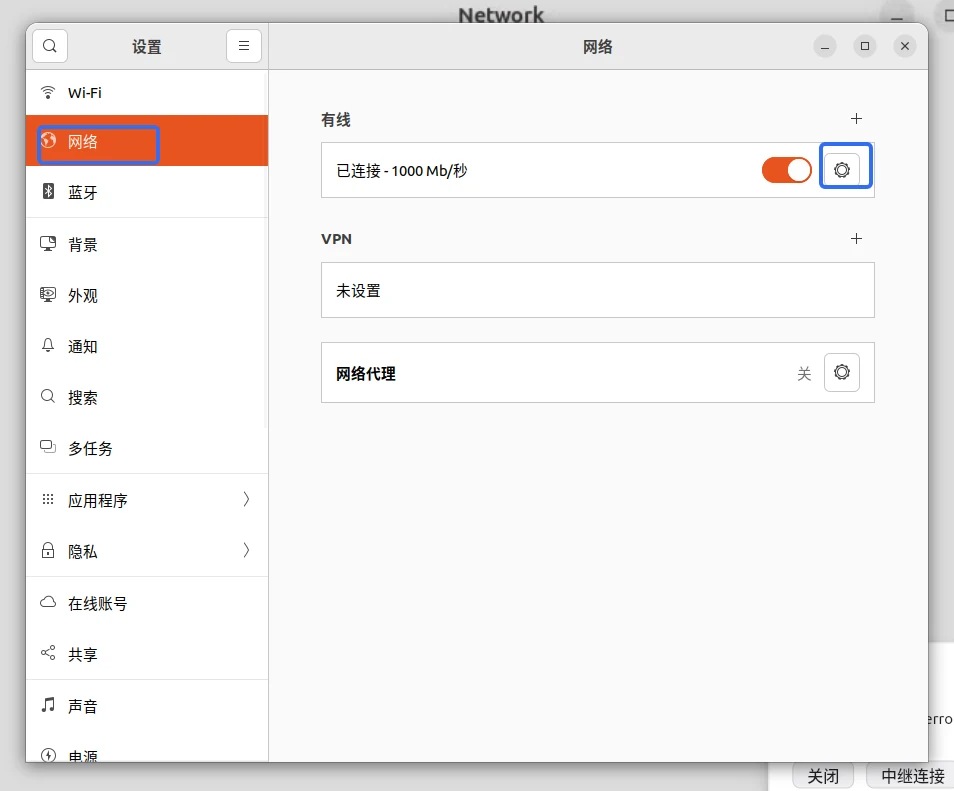
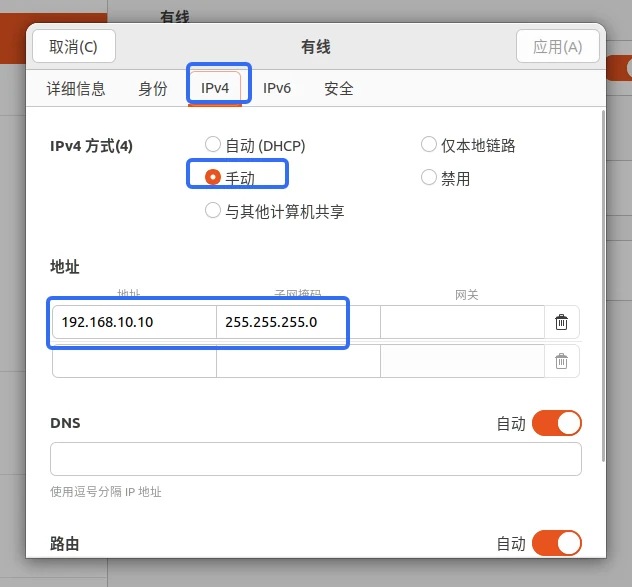
- Set IP configuration to manual, and enter the IP address and subnet mask
Click Apply after completing the configuration
Temporarily Configure the Robot's LAN IP
The LAN IP configured in this way will become invalid after the robot restarts and must be reconfigured.
! SSH login requires the robot's Wi-Fi connection and wireless IP address to be configured in advance. Follow the steps below.Before logging in to the robot via SSH, configure Wi-Fi for the robot body first and record the robot's current wireless IP.
Wi-Fi network configuration
-
Access the desktop of the robot body via an existing remote connection method. The robot must already have an available 5G or Wi-Fi remote connection to perform remote desktop operations.
-
Open a browser on the desktop of the robot body and enter:
http://localhost/Normally, the "Network Settings" page will open. If it does not navigate automatically, you can directly enter:
http://localhost/robot/network-
Click "Scan Wi-Fi List", select the Wi-Fi network to connect to, enter the password, and click "Connect".
-
After the connection is successful, record the robot's wireless IP displayed on the page.
Note: Do not enter http://localhost/ in a browser on the master-arm station PC or personal PC, because localhost refers to that PC. On the master-arm station, http://localhost/ opens the station WebUI rather than the robot network settings page. Do not use http://ex001-xxx as a general entry point unless you have confirmed that the current PC can resolve the robot hostname correctly.
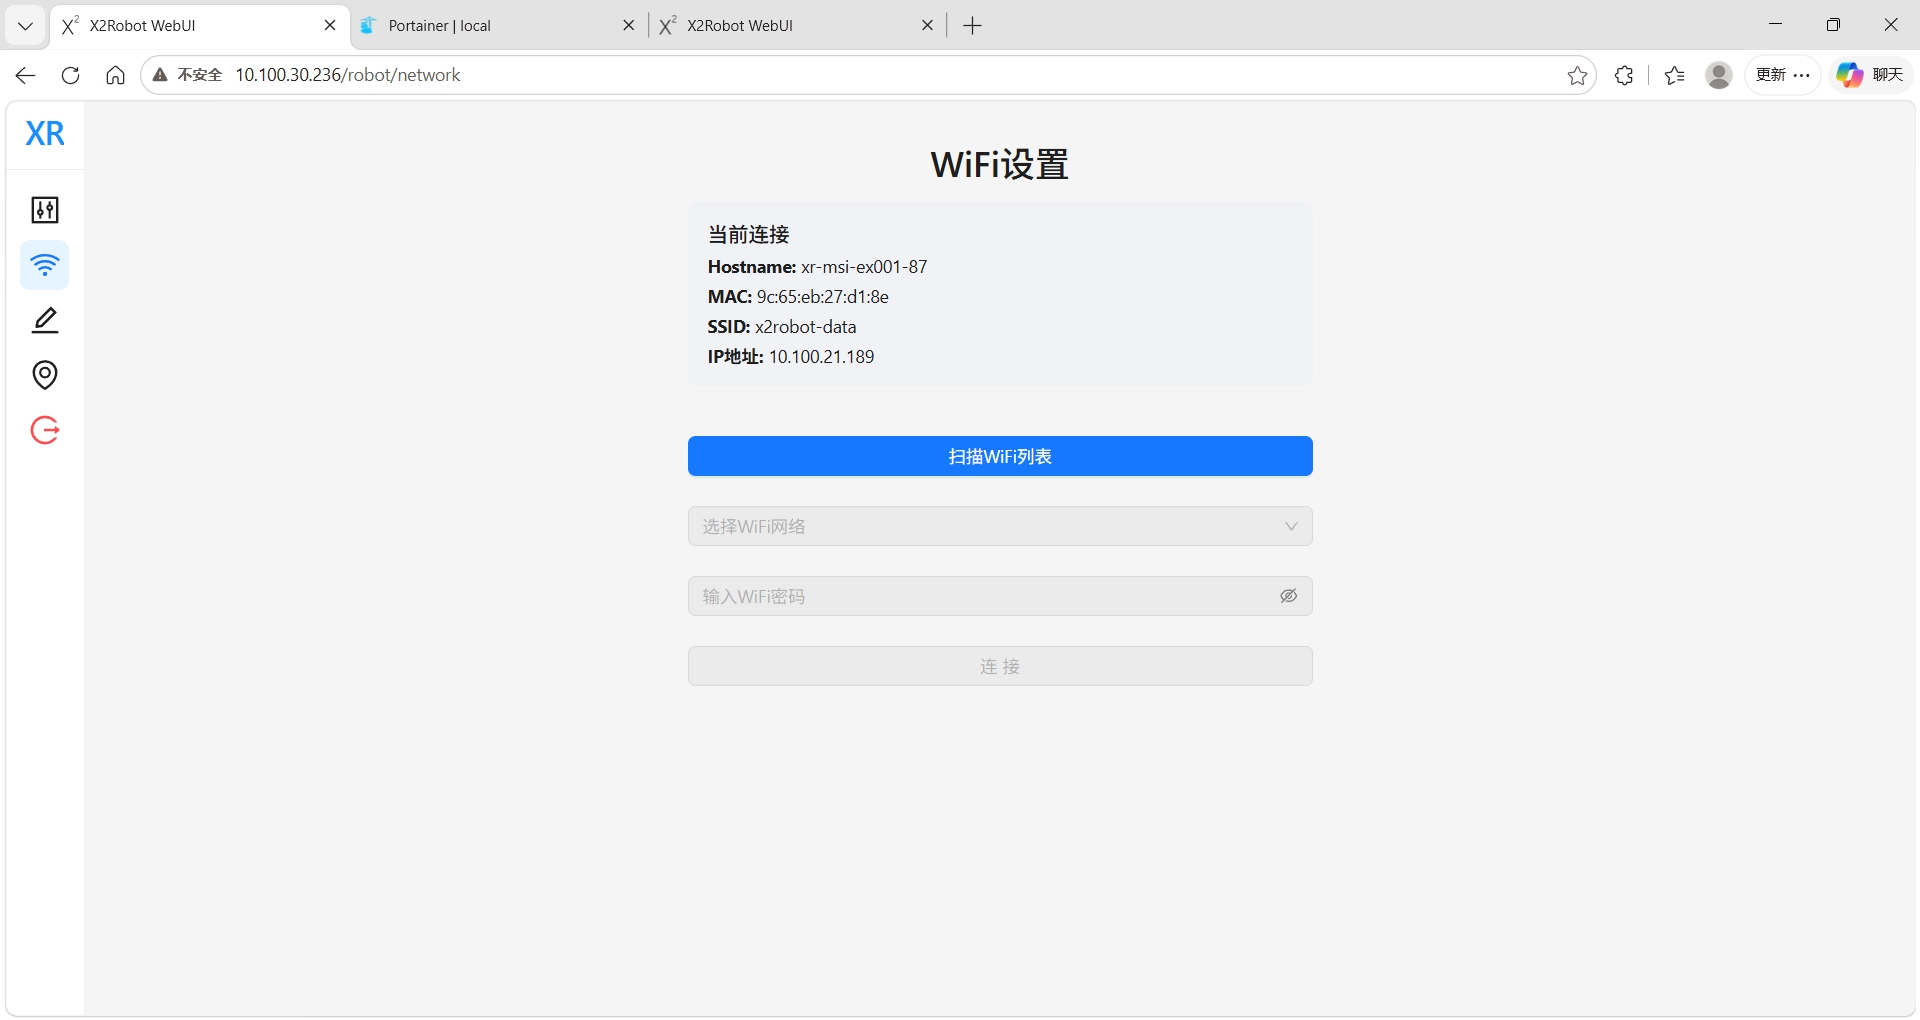
Click Scan Wi-Fi List, and the currently available Wi-Fi networks will be displayed
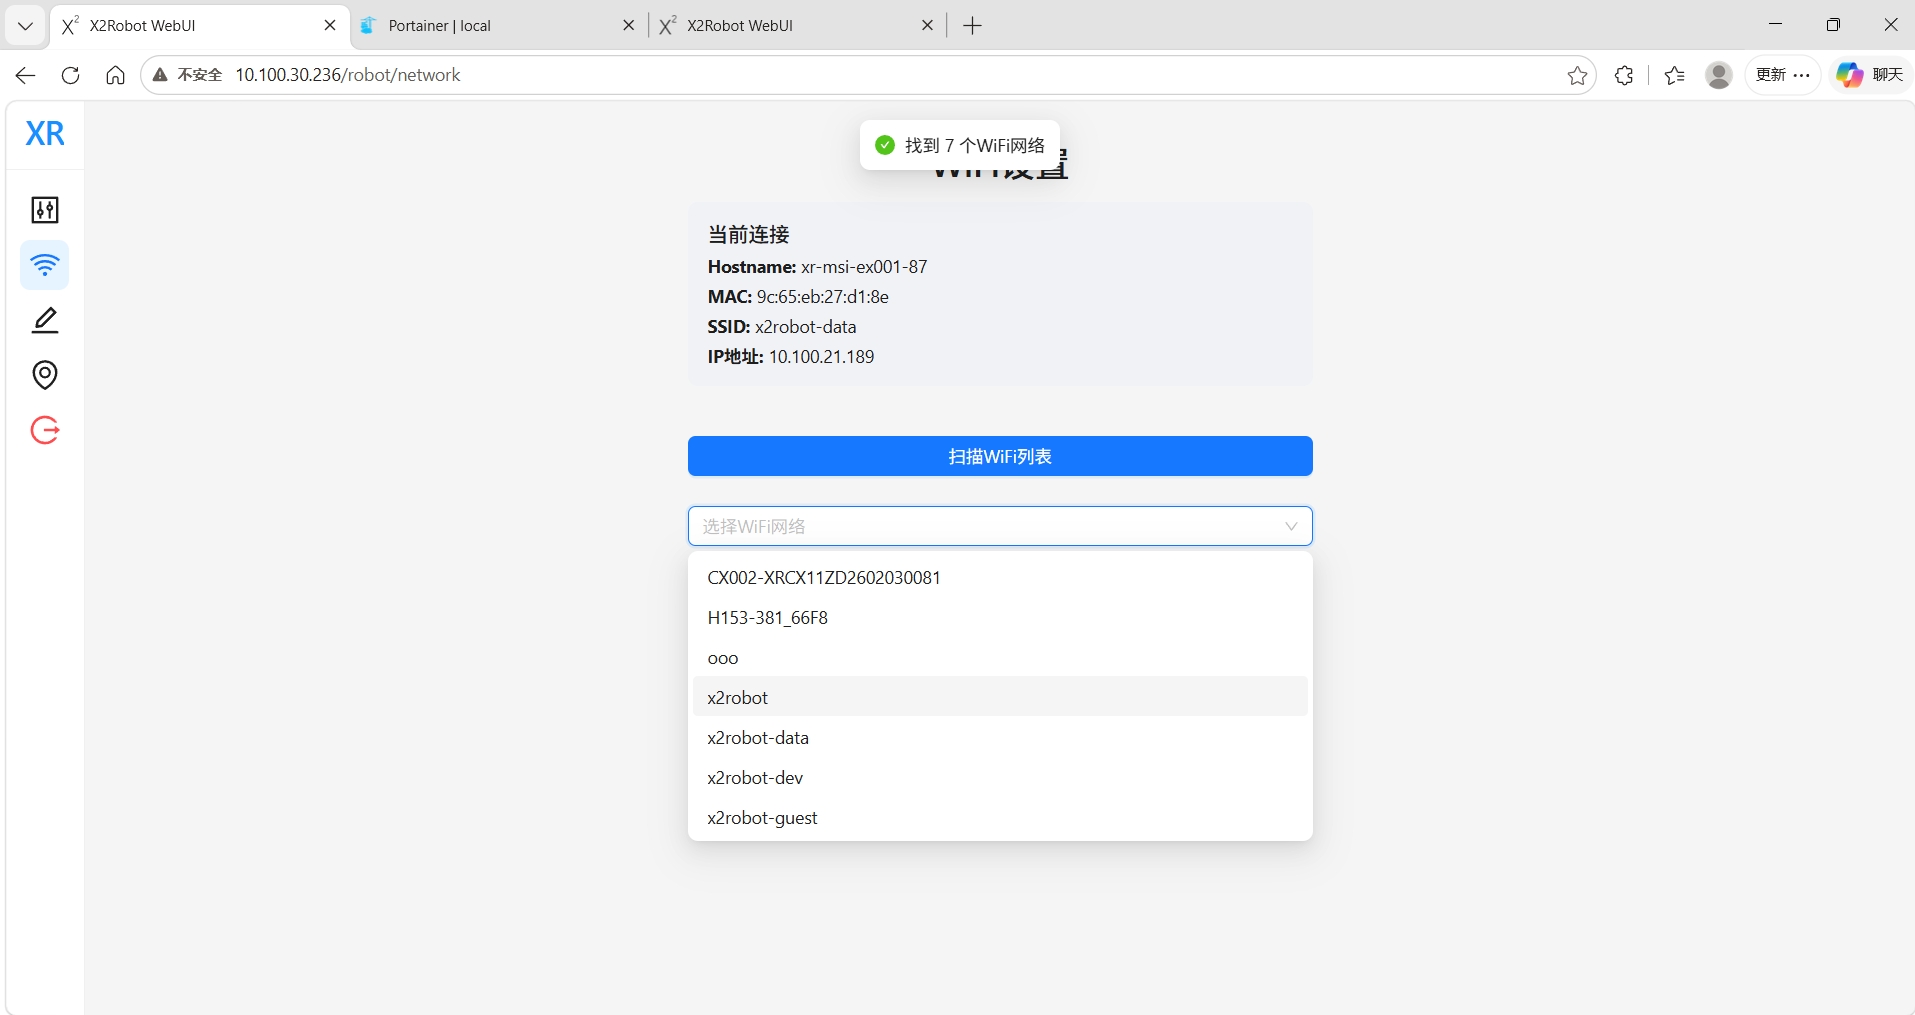
Select an appropriate Wi-Fi network and enter the correct password to connect.
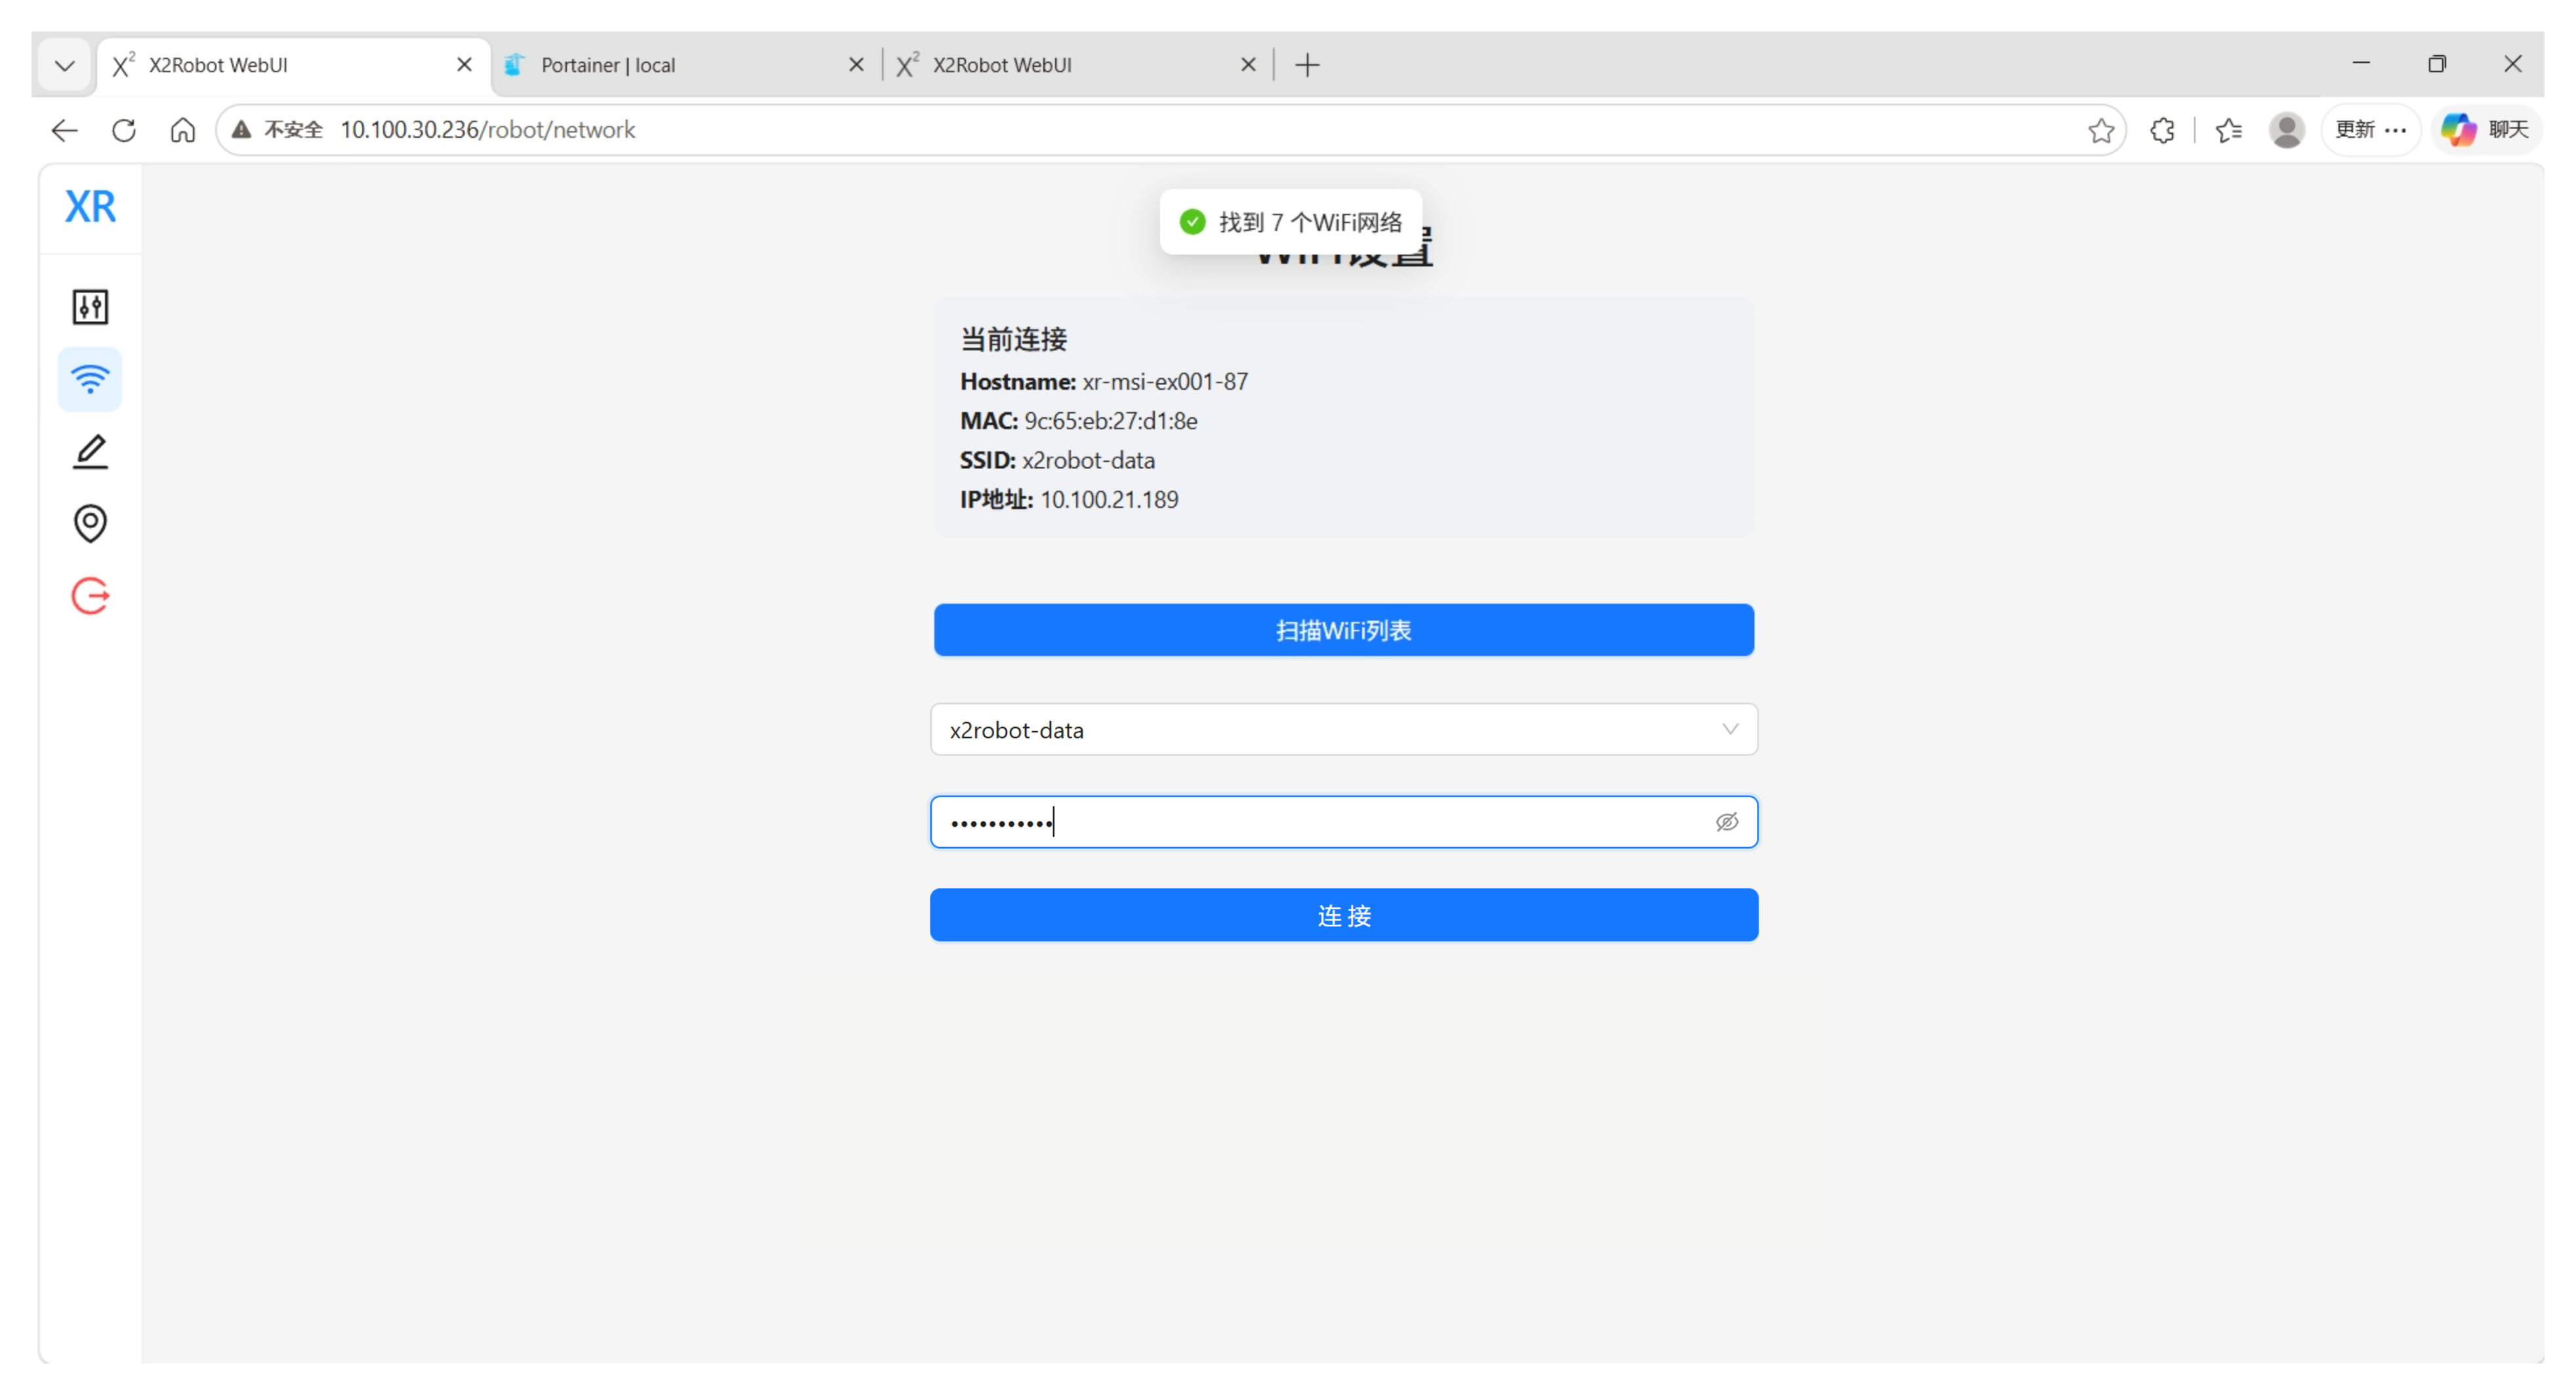
After Wi-Fi configuration is complete, log in on the personal PC using the actual wireless IP of the robot:
- Log in to the robot via SSH (xr user password: 123)
ssh xr@<robot_wireless_IP>After logging in successfully, continue with the subsequent network port discovery and temporary LAN IP configuration steps in this section.
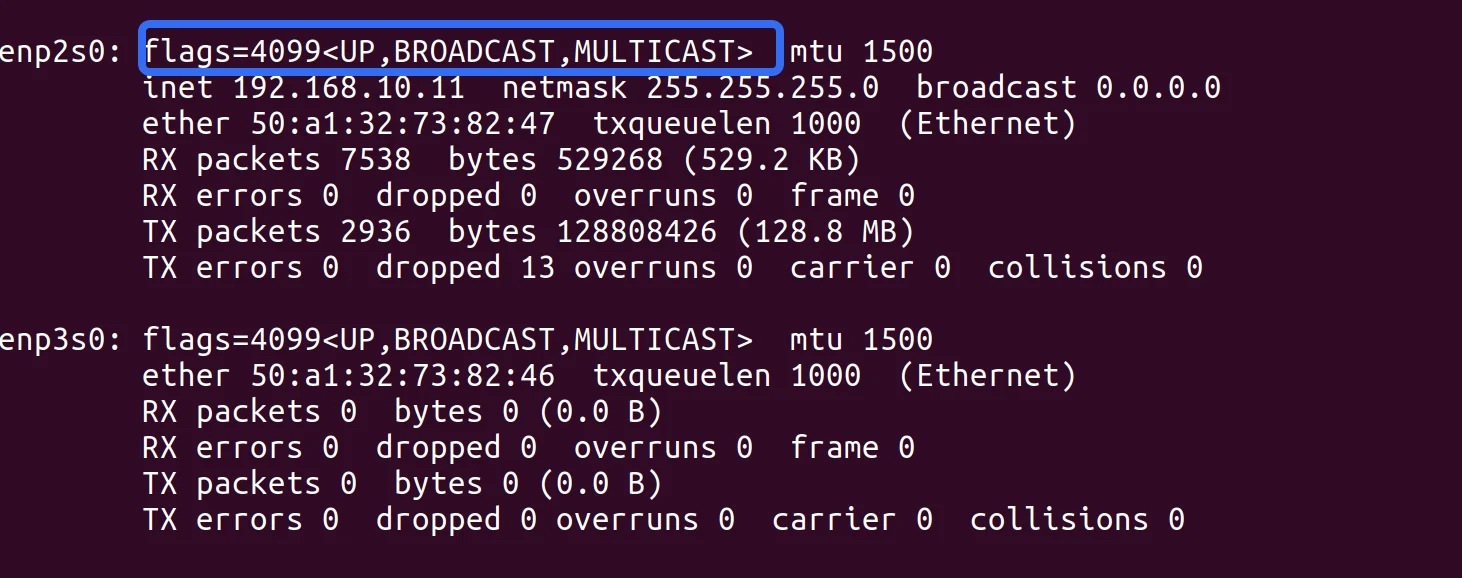
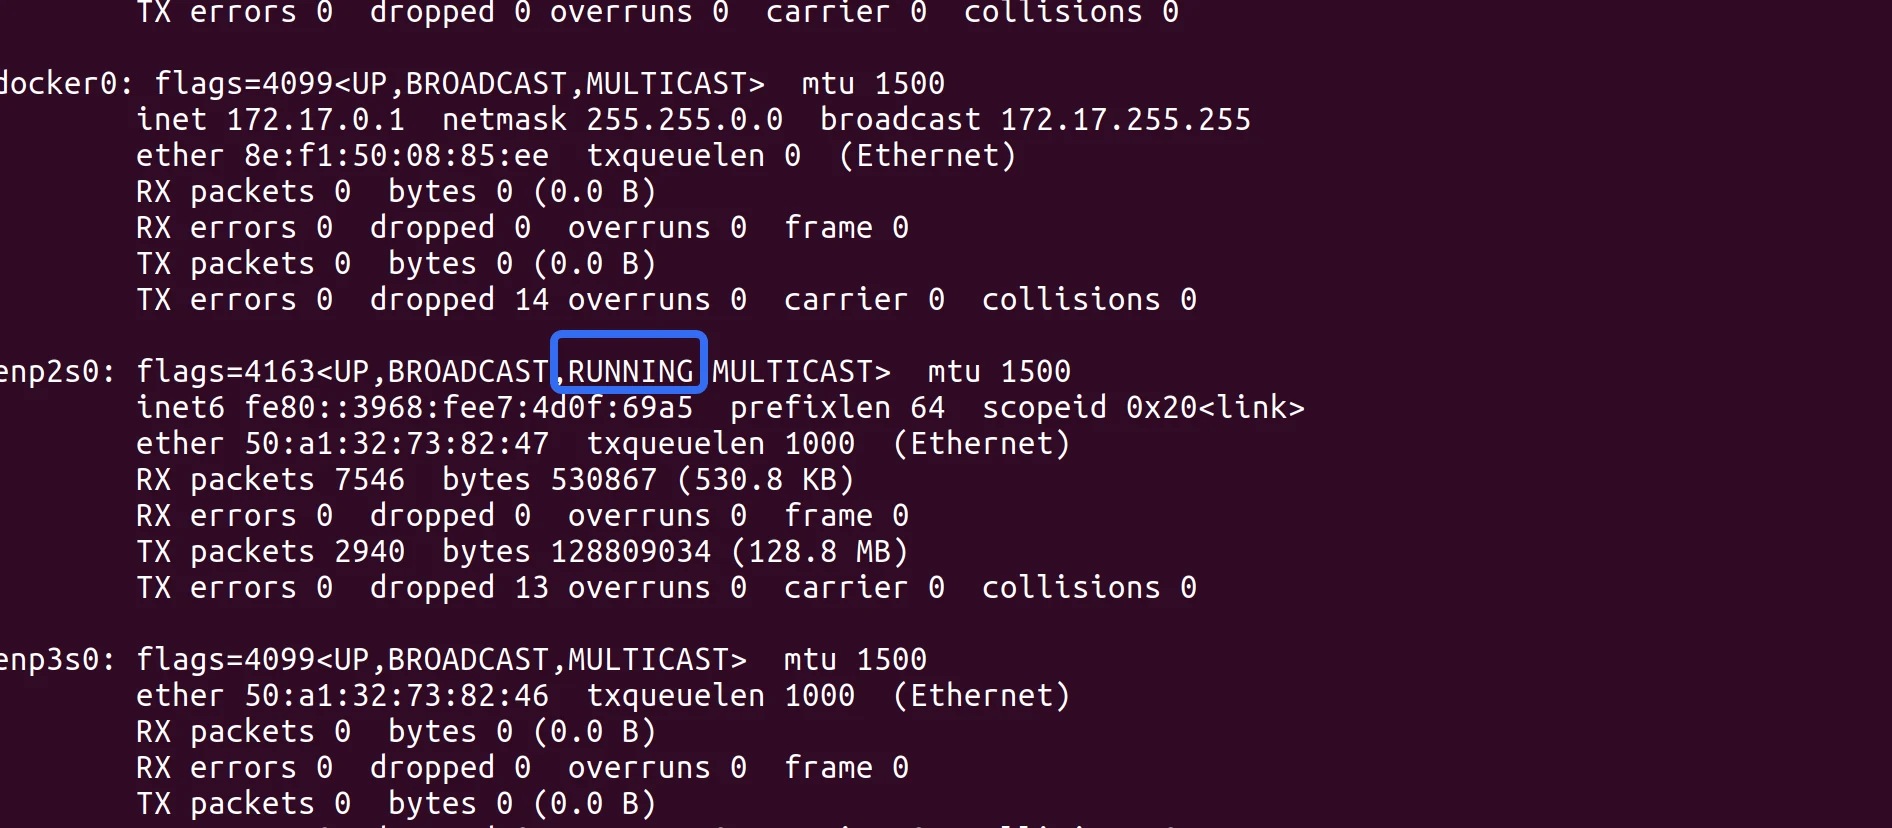
- Find the network port connected to the personal PC
ifconfigDetermine which network port it is by observing the interface status change before and after connecting the network cable (from not having RUNNING to RUNNING)
- Add the LAN IP and netmask for the corresponding network port
sudo ip addr add 192.168.10.1/24 dev enp2s0Permanently Configure the Robot's IP
Visual Configuration After Remote Desktop Connection
Remotely access the robot IP address using RustDesk on the PC. RustDesk is normally pre-installed on the robot at the factory.
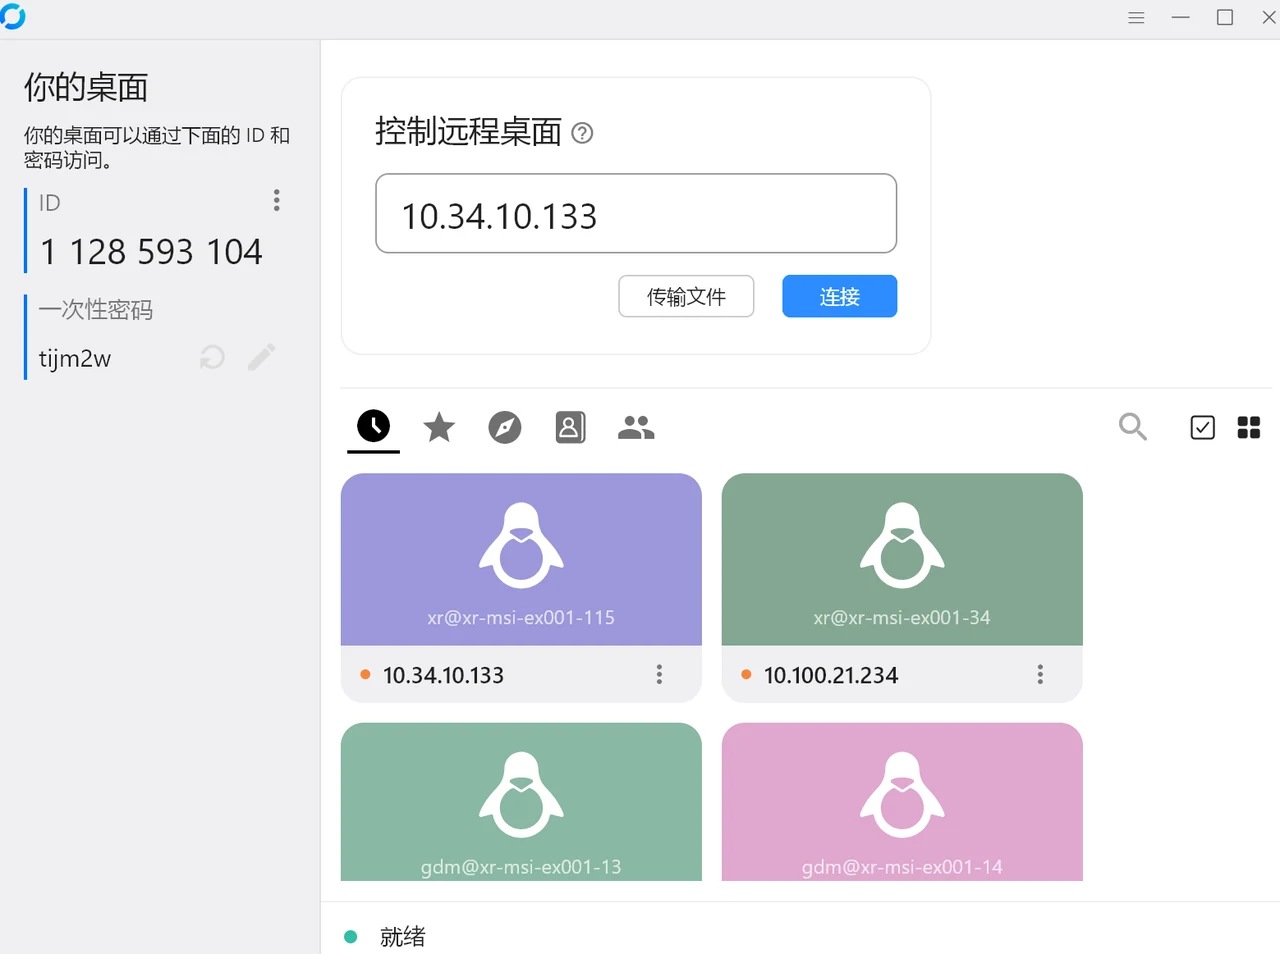
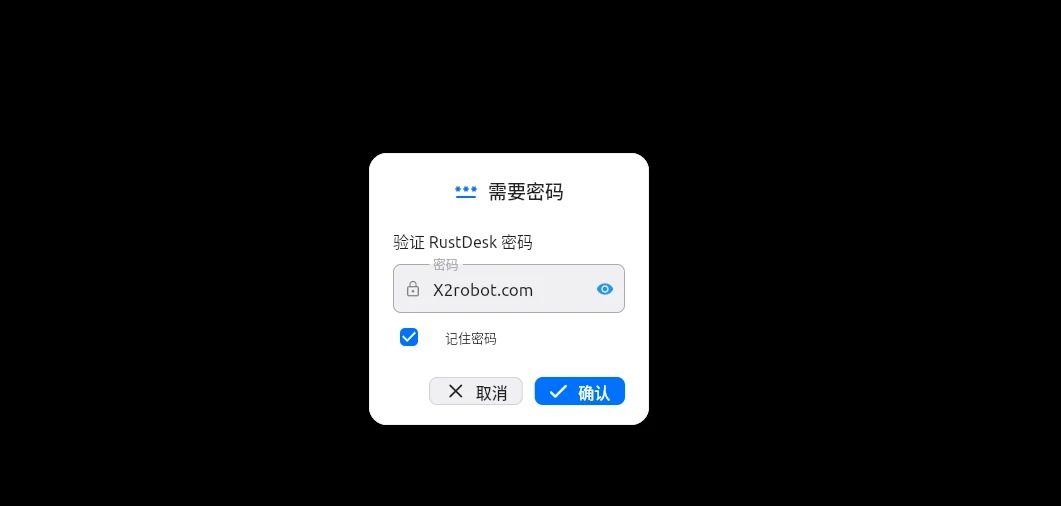
After connecting, enter the password X2robot.com to access the robot desktop. The xr user password is 123.
Set IP configuration to manual, and enter the IP address and subnet mask
Click Apply after completing the configuration
Configure IP Using the Nmcli Command
You can also log in to the robot via SSH and configure it using nmcli. Remember to replace the interface name enp2s0 with the actual interface name that needs to be modified
# Configure IP
sudo nmcli device modify "enp2s0" \
  ipv4.method manual \
  ipv4.addresses 192.168.10.1/24 \
  ipv4.gateway "" \
  ipv4.dns "" \
  connection.autoconnect yes
Restart the Network Interface
After configuring the IPs of the robot and local PC, you need to restart the network port for the changes to take effect; restarting either end will suffice
Restart via command line
# View network interfaces
ifconfig

# Restart the network interface
sudo ifconfig eth0 down
sudo ifconfig eth0 up
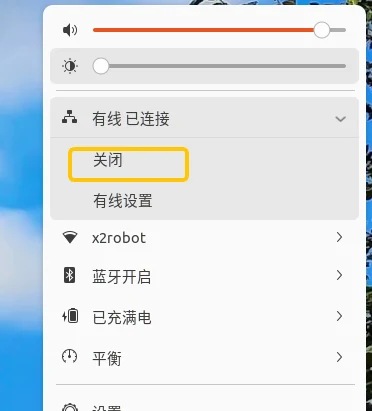
Or click to disable and then re-enable via the UI
Confirm Connectivity
Finally, ping the robot from the personal PC to confirm connectivity.
ping 192.168.10.1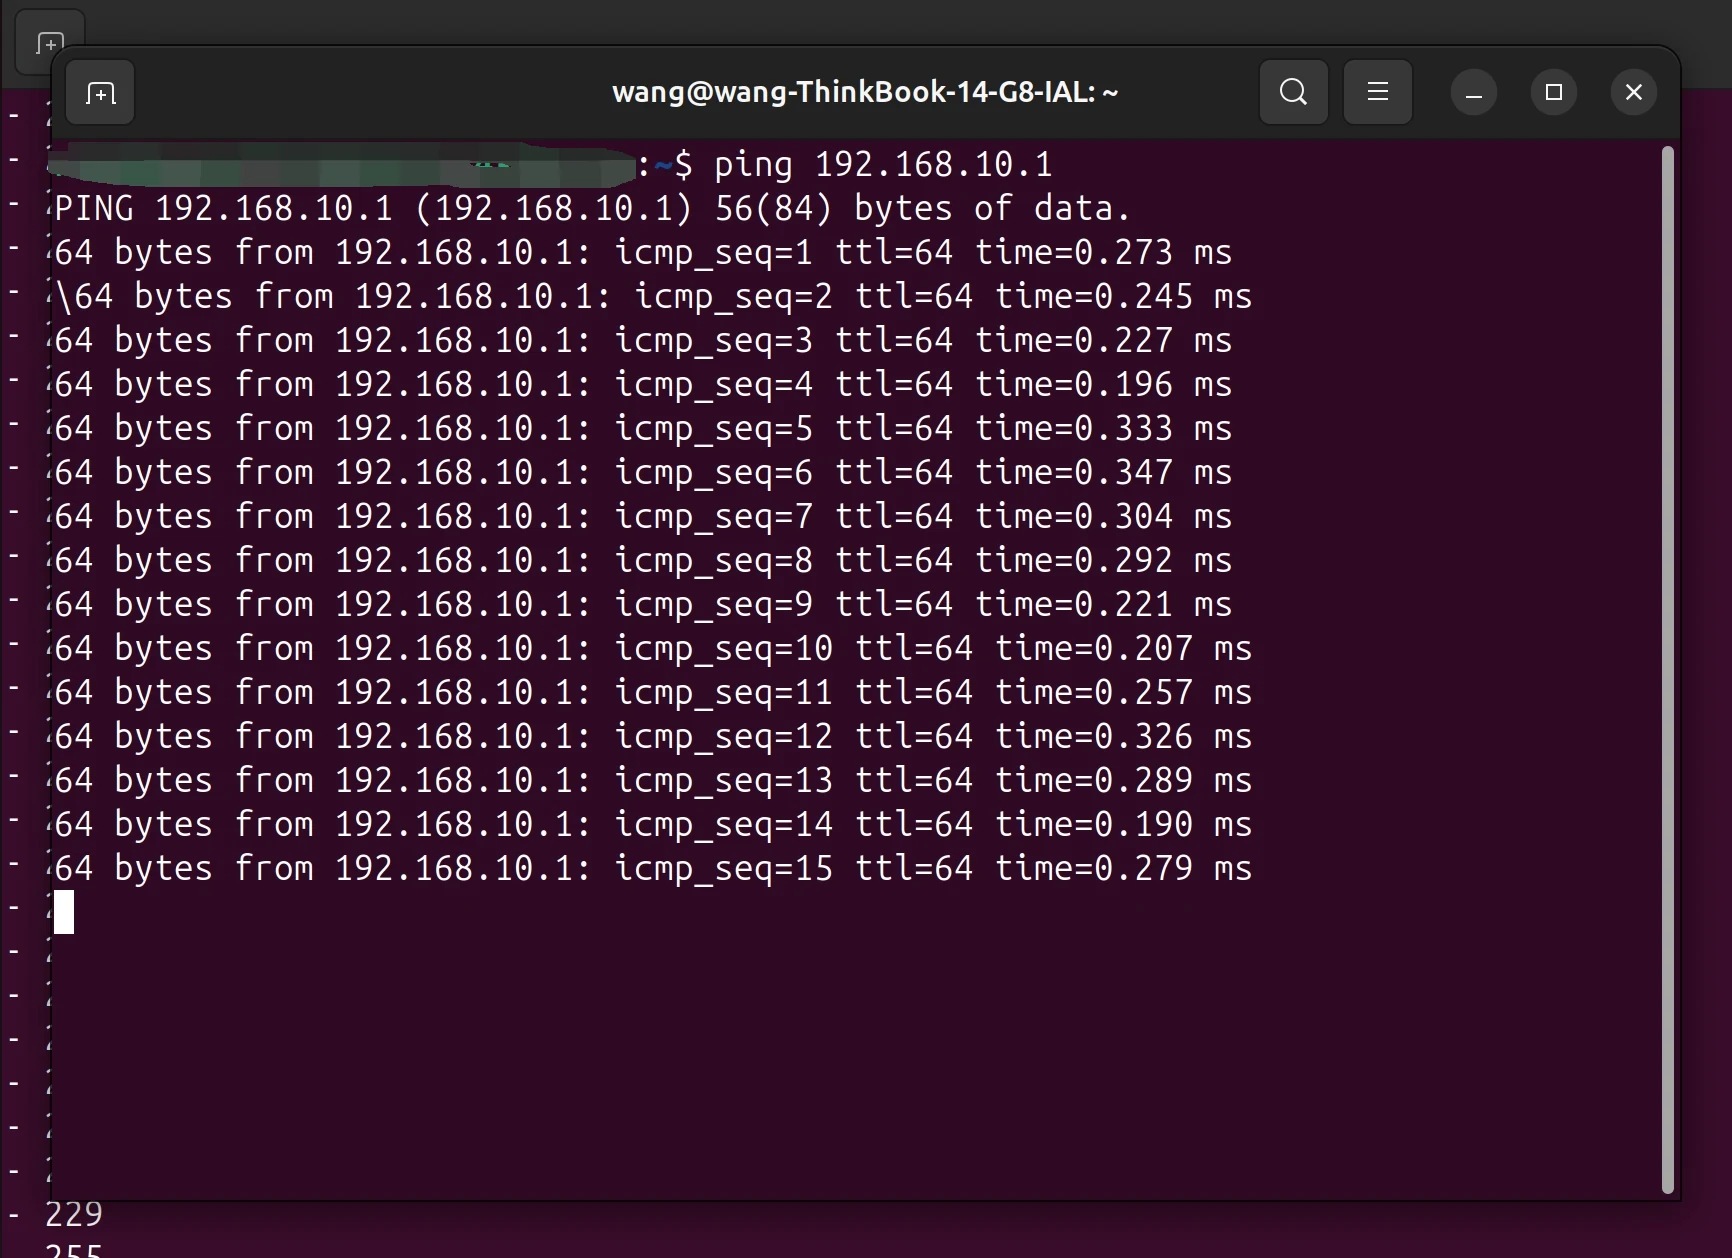
Install the SDK
Install Dependencies
sudo apt-get update
sudo apt install python3-pip
sudo apt install ffmpeg
Update pip mirror (for users in mainland China)
Downloading some dependencies may be slow during SDK installation. Users in mainland China can use a different pip mirror for the download.
# Configure Tsinghua University mirror
pip config set global.index-url https://pypi.tuna.tsinghua.edu.cn/simple
# Or configure Alibaba Cloud mirror
# pip config set global.index-url https://mirrors.aliyun.com/pypi/simple/
Configure a Virtual Environment
The default Python versions of Ubuntu 24.04 and Ubuntu 22.04 may differ. Users need to configure the virtual environment according to their installed version
# Ubuntu 24.04: Install the Python virtual-environment package
sudo apt install python3.12-venv

# Ubuntu 22.04: Install the Python virtual-environment package
# sudo apt install python3.10-venv

# Create a virtual environment
python3 -m venv .venv

# Activate the virtual environment
source .venv/bin/activate
Install the SDK
# Install the whl package according to the version at https://github.com/X-Square-Robot/sdk_robot/releases
pip install x2robot-1.0.0-py3-none-any.whl
Run the first program
Connection test
Create check_connect.py:
from typing import Annotated

import typer

from x2robot import connect
from x2robot.sdk import PingRequest


def main(
    server: Annotated[
        str,
        typer.Option(help="server address, e.g., localhost:50051"),
    ] = "localhost:50051",
):
    robot = connect(f"x2://{server}")

    request = PingRequest(payload="Hello, X2Robot!")
    response = robot.benchmark.ping(request)

    if response.payload == "Pong to: Hello, X2Robot!":
        print("Connection to X2Robot SDK server successful!")
        print(f"Response payload:[{response.payload}]")
    else:
        print("Unexpected response:", response.payload)


if __name__ == "__main__":
    typer.run(main)
Run the program
# Replace the address with the actual robot IP and SDK server port
python3 check_connect.py --server 192.168.10.1:50051

# Expected output example
Connection to X2Robot SDK server successful!
Response payload:[Pong to: Hello, X2Robot!]
The format of the --server parameter is robot IP:port, without adding x2://. The sample program will automatically construct the complete connection address when calling connect().
Other Examples
Refer to the examples at https://github.com/X-Square-Robot/sdk_robot/tree/main/examples or in the archive below to call the interfaces described in the Basic Examples section.
When running the examples, add the parameter --server <robot_IP>:50051.
Example: python3 head_control.py --server 192.168.10.1:50051
Uninstall SDK
When updating the SDK, uninstall the previous version first.
! The SDK must also be uninstalled from within the SDK virtual environment.
# Uninstall x2robot, assuming you previously installed version 0.1.8
pip uninstall x2robot-0.1.8-py3-none-any.whl