Teleoperation Guide
Safely connect to and teleoperate Quanta X1 Pro using the master arm station or a Pico 4 Ultra Enterprise VR device.
Quanta X1 Pro supports two teleoperation methods: the master arm station and VR. Before teleoperation, check the robot's emergency stop, wireless emergency stop, network connection, and device status, and clear people and obstacles from the robot's range of motion.
Master Arm Station Teleoperation
Connect to the Robot
-
Power on the master arm station PC and the robot, wait 1–2 minutes, and confirm that both have started normally.
-
Open a browser on the master arm station PC and go to http://localhost/client/home.
-
On the home page, select the target robot by its SN or IP address and connect.
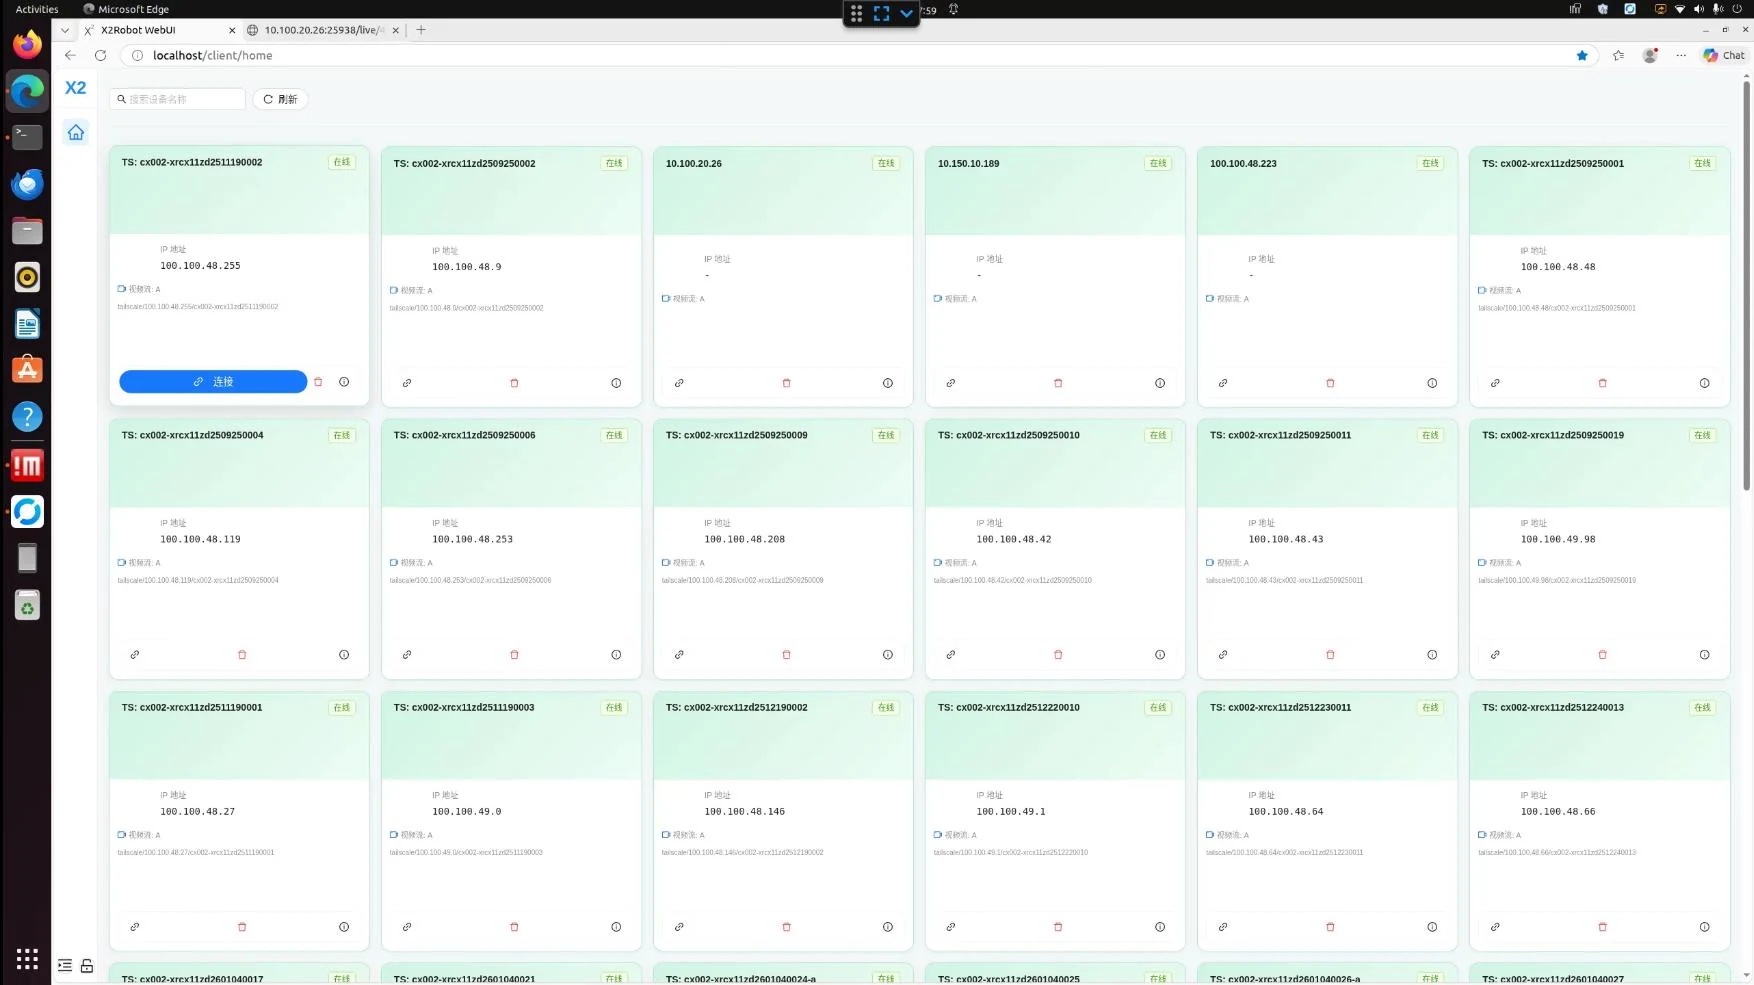
Select the robot by SN or IP in the WebUI
Start Teleoperation
After entering the data collection UI, the system is in idle mode by default. Confirm that the camera feeds, network, and devices are working normally, then click "Start Teleoperation" to establish a master-slave connection.
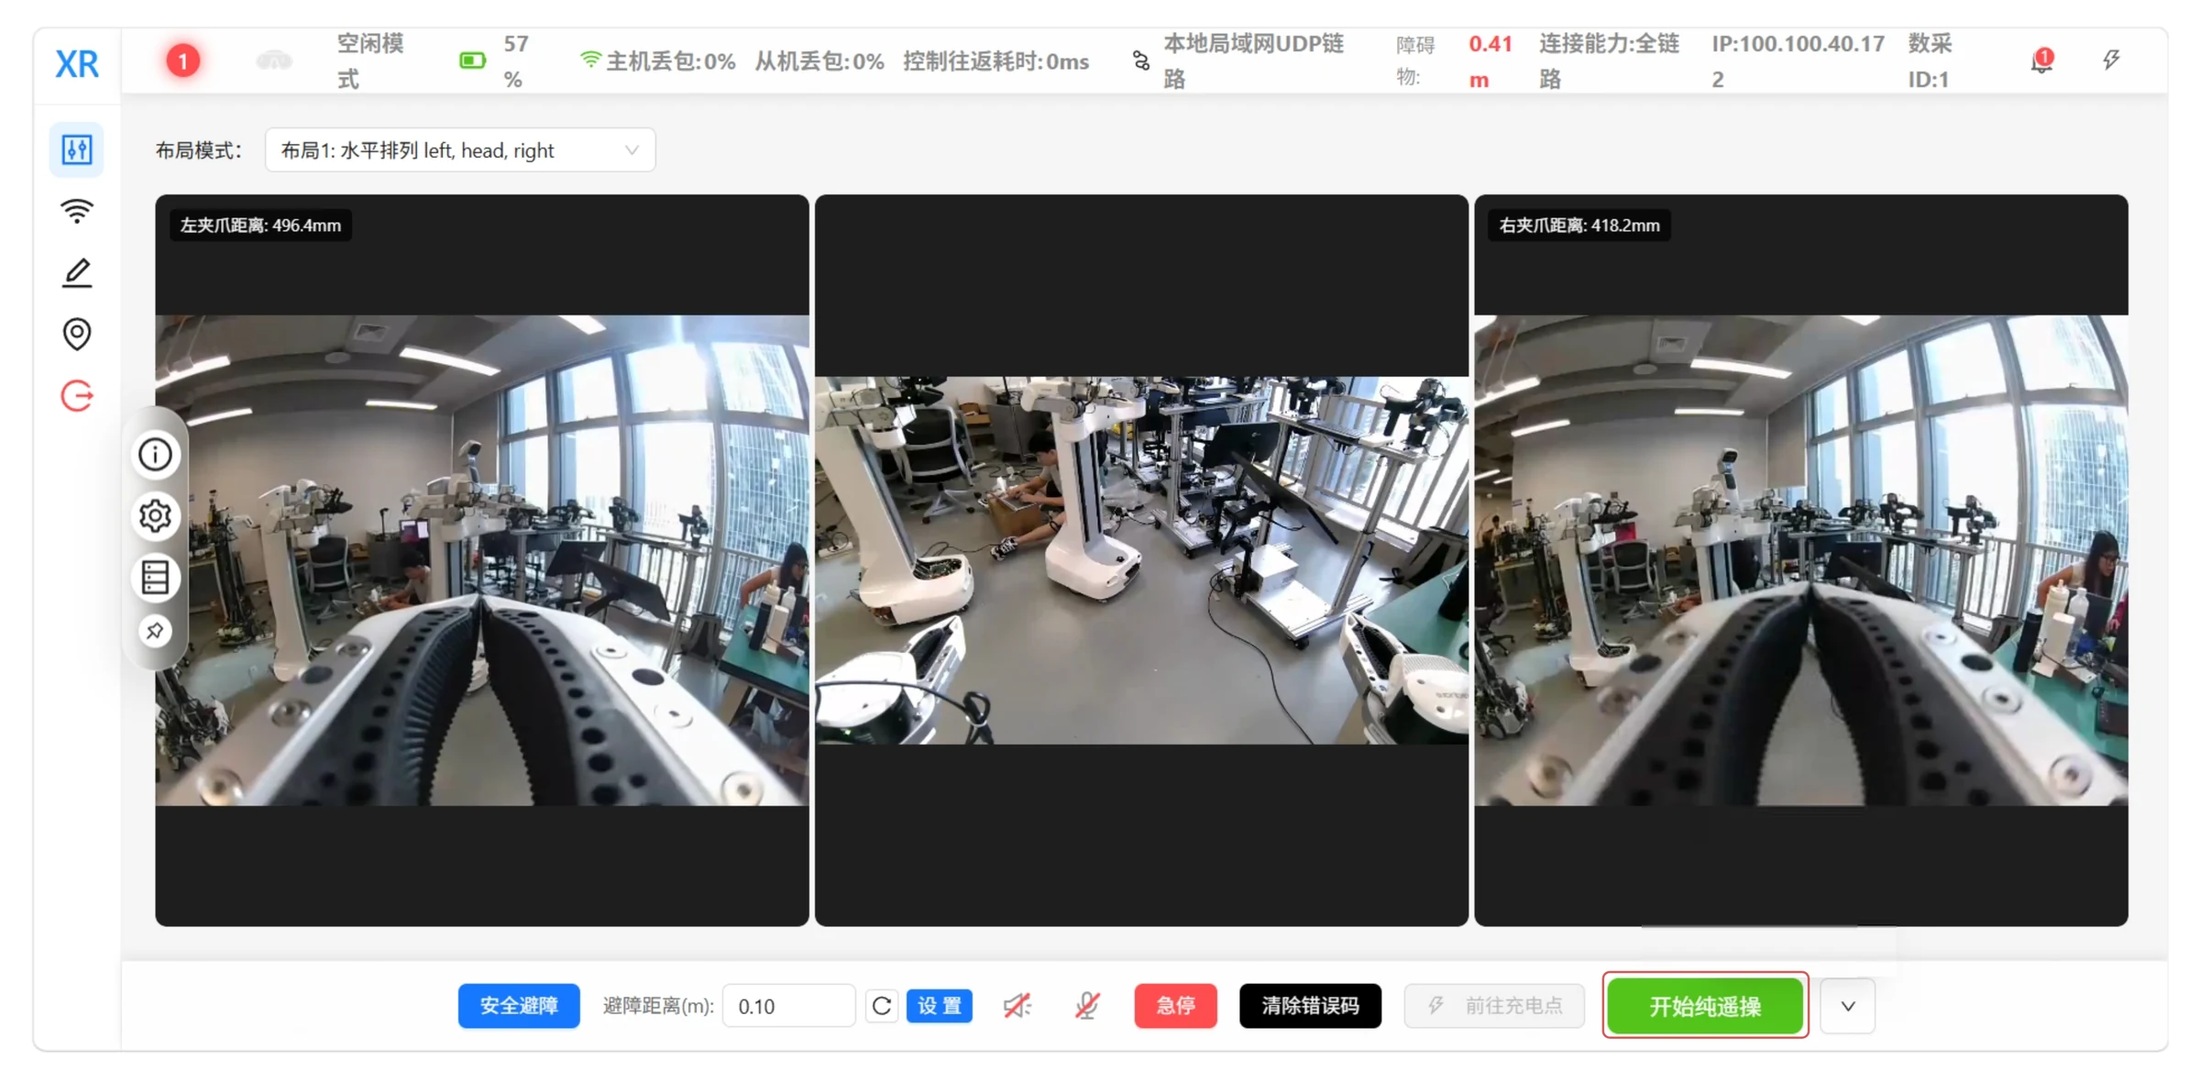
Start teleoperation in the WebUI
Station Components
The master arm station includes a PC, mechanical master arms, a monitor, an integrated touch keyboard and mouse, an emergency stop switch, a power strip, and other modules. Once the power strip is powered on, press the PC power button to start the station. The master arm station and Quanta X1 Pro should be connected to the same LAN.


Master arm station left handle

Master arm station right handle
| Handle Structure | Corresponding Operation |
|---|---|
| Left handle trigger | Controls opening and closing of the left gripper |
| Right handle trigger | Controls opening and closing of the right gripper |
| Left handle joystick | Controls the head: push up to pitch up, push down to pitch down, push left to turn the head left, and push right to turn the head right |
| Right handle joystick | Controls the chassis: push up to move forward, push down to move backward, push left to turn left, and push right to turn right |
| Button 1 (upper button on left handle) | Raises the waist |
| Button 2 (lower button on left handle) | Lowers the waist |
| Button 3 (upper button on right handle) | Press and hold to start or stop data collection; press briefly to switch between task variants |
| Button 4 (lower button on right handle) | Press twice to recenter the head; press once to switch the viewing mode |
VR Device Teleoperation
The supported VR device model is Pico 4 Ultra Enterprise.
Connect to the Robot
-
Power on the PC used with the VR device and the robot, wait 1–2 minutes, and confirm that the robot has started normally.
-
Open a browser on the PC and go to http://localhost/client/home.
-
On the home page, select the target robot by its SN or IP address and connect.
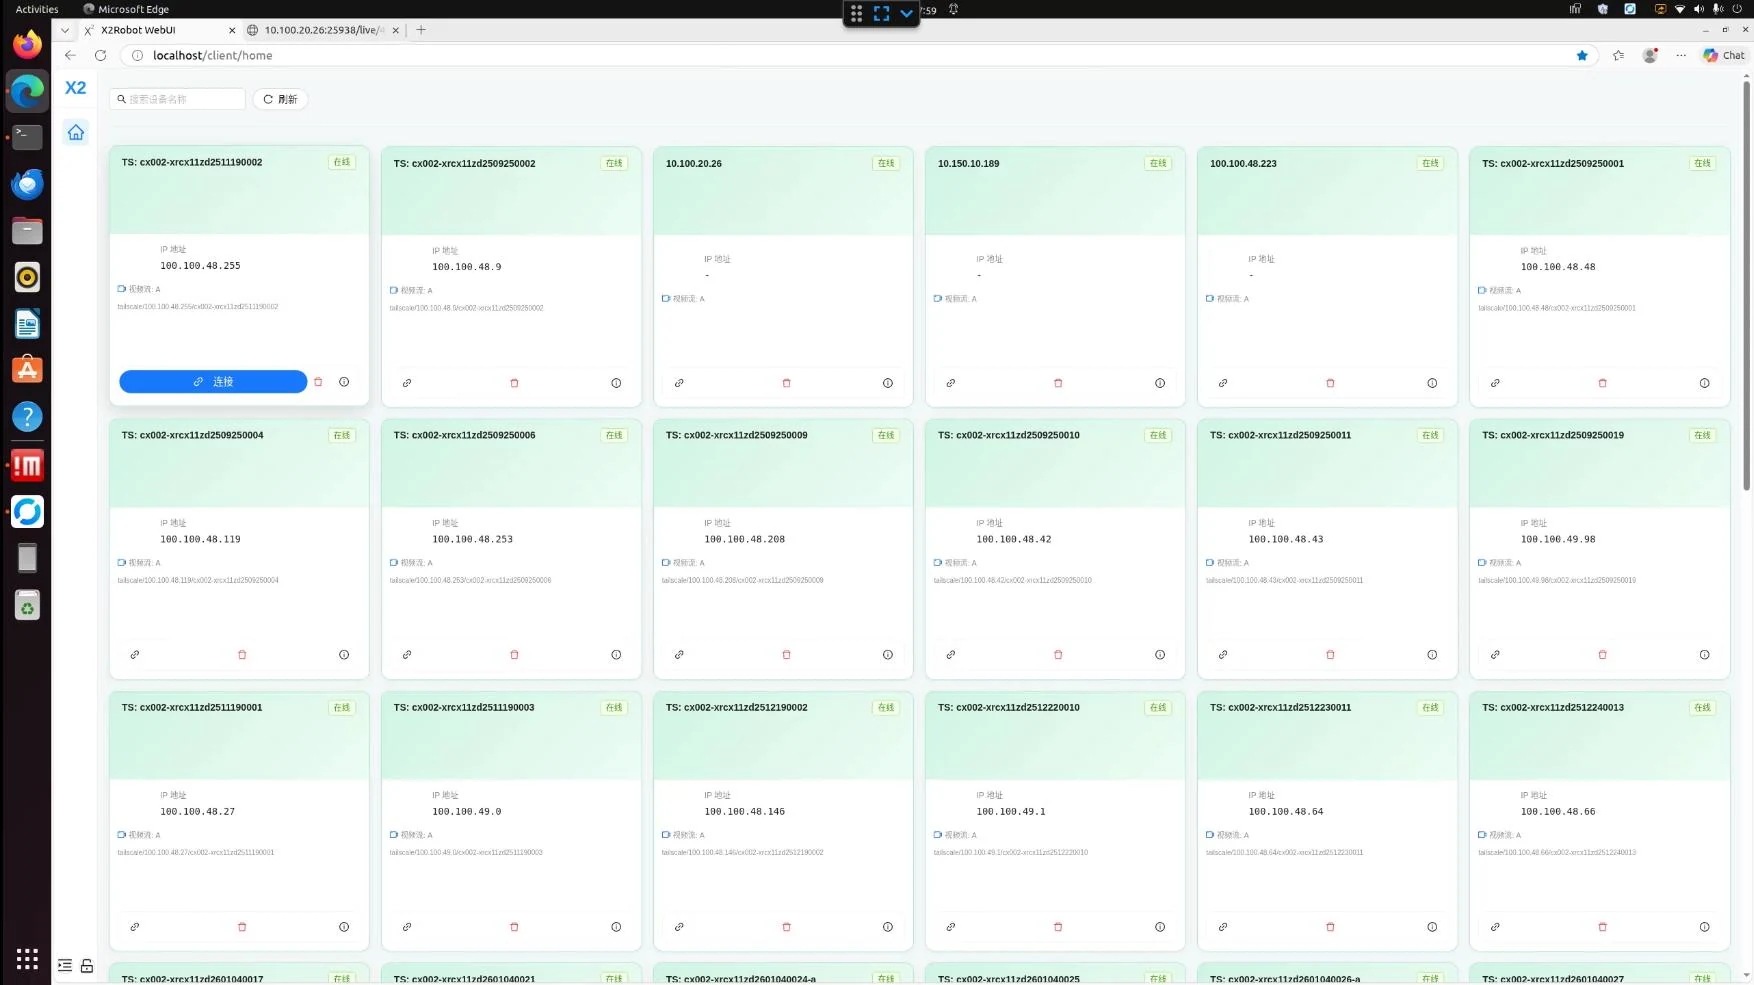
Select the target robot for VR teleoperation in the WebUI
Connect and Launch the VR Application
-
Connect the VR device to the PC using a USB cable.
-
Put on the VR headset and open "Library" from the taskbar at the bottom.
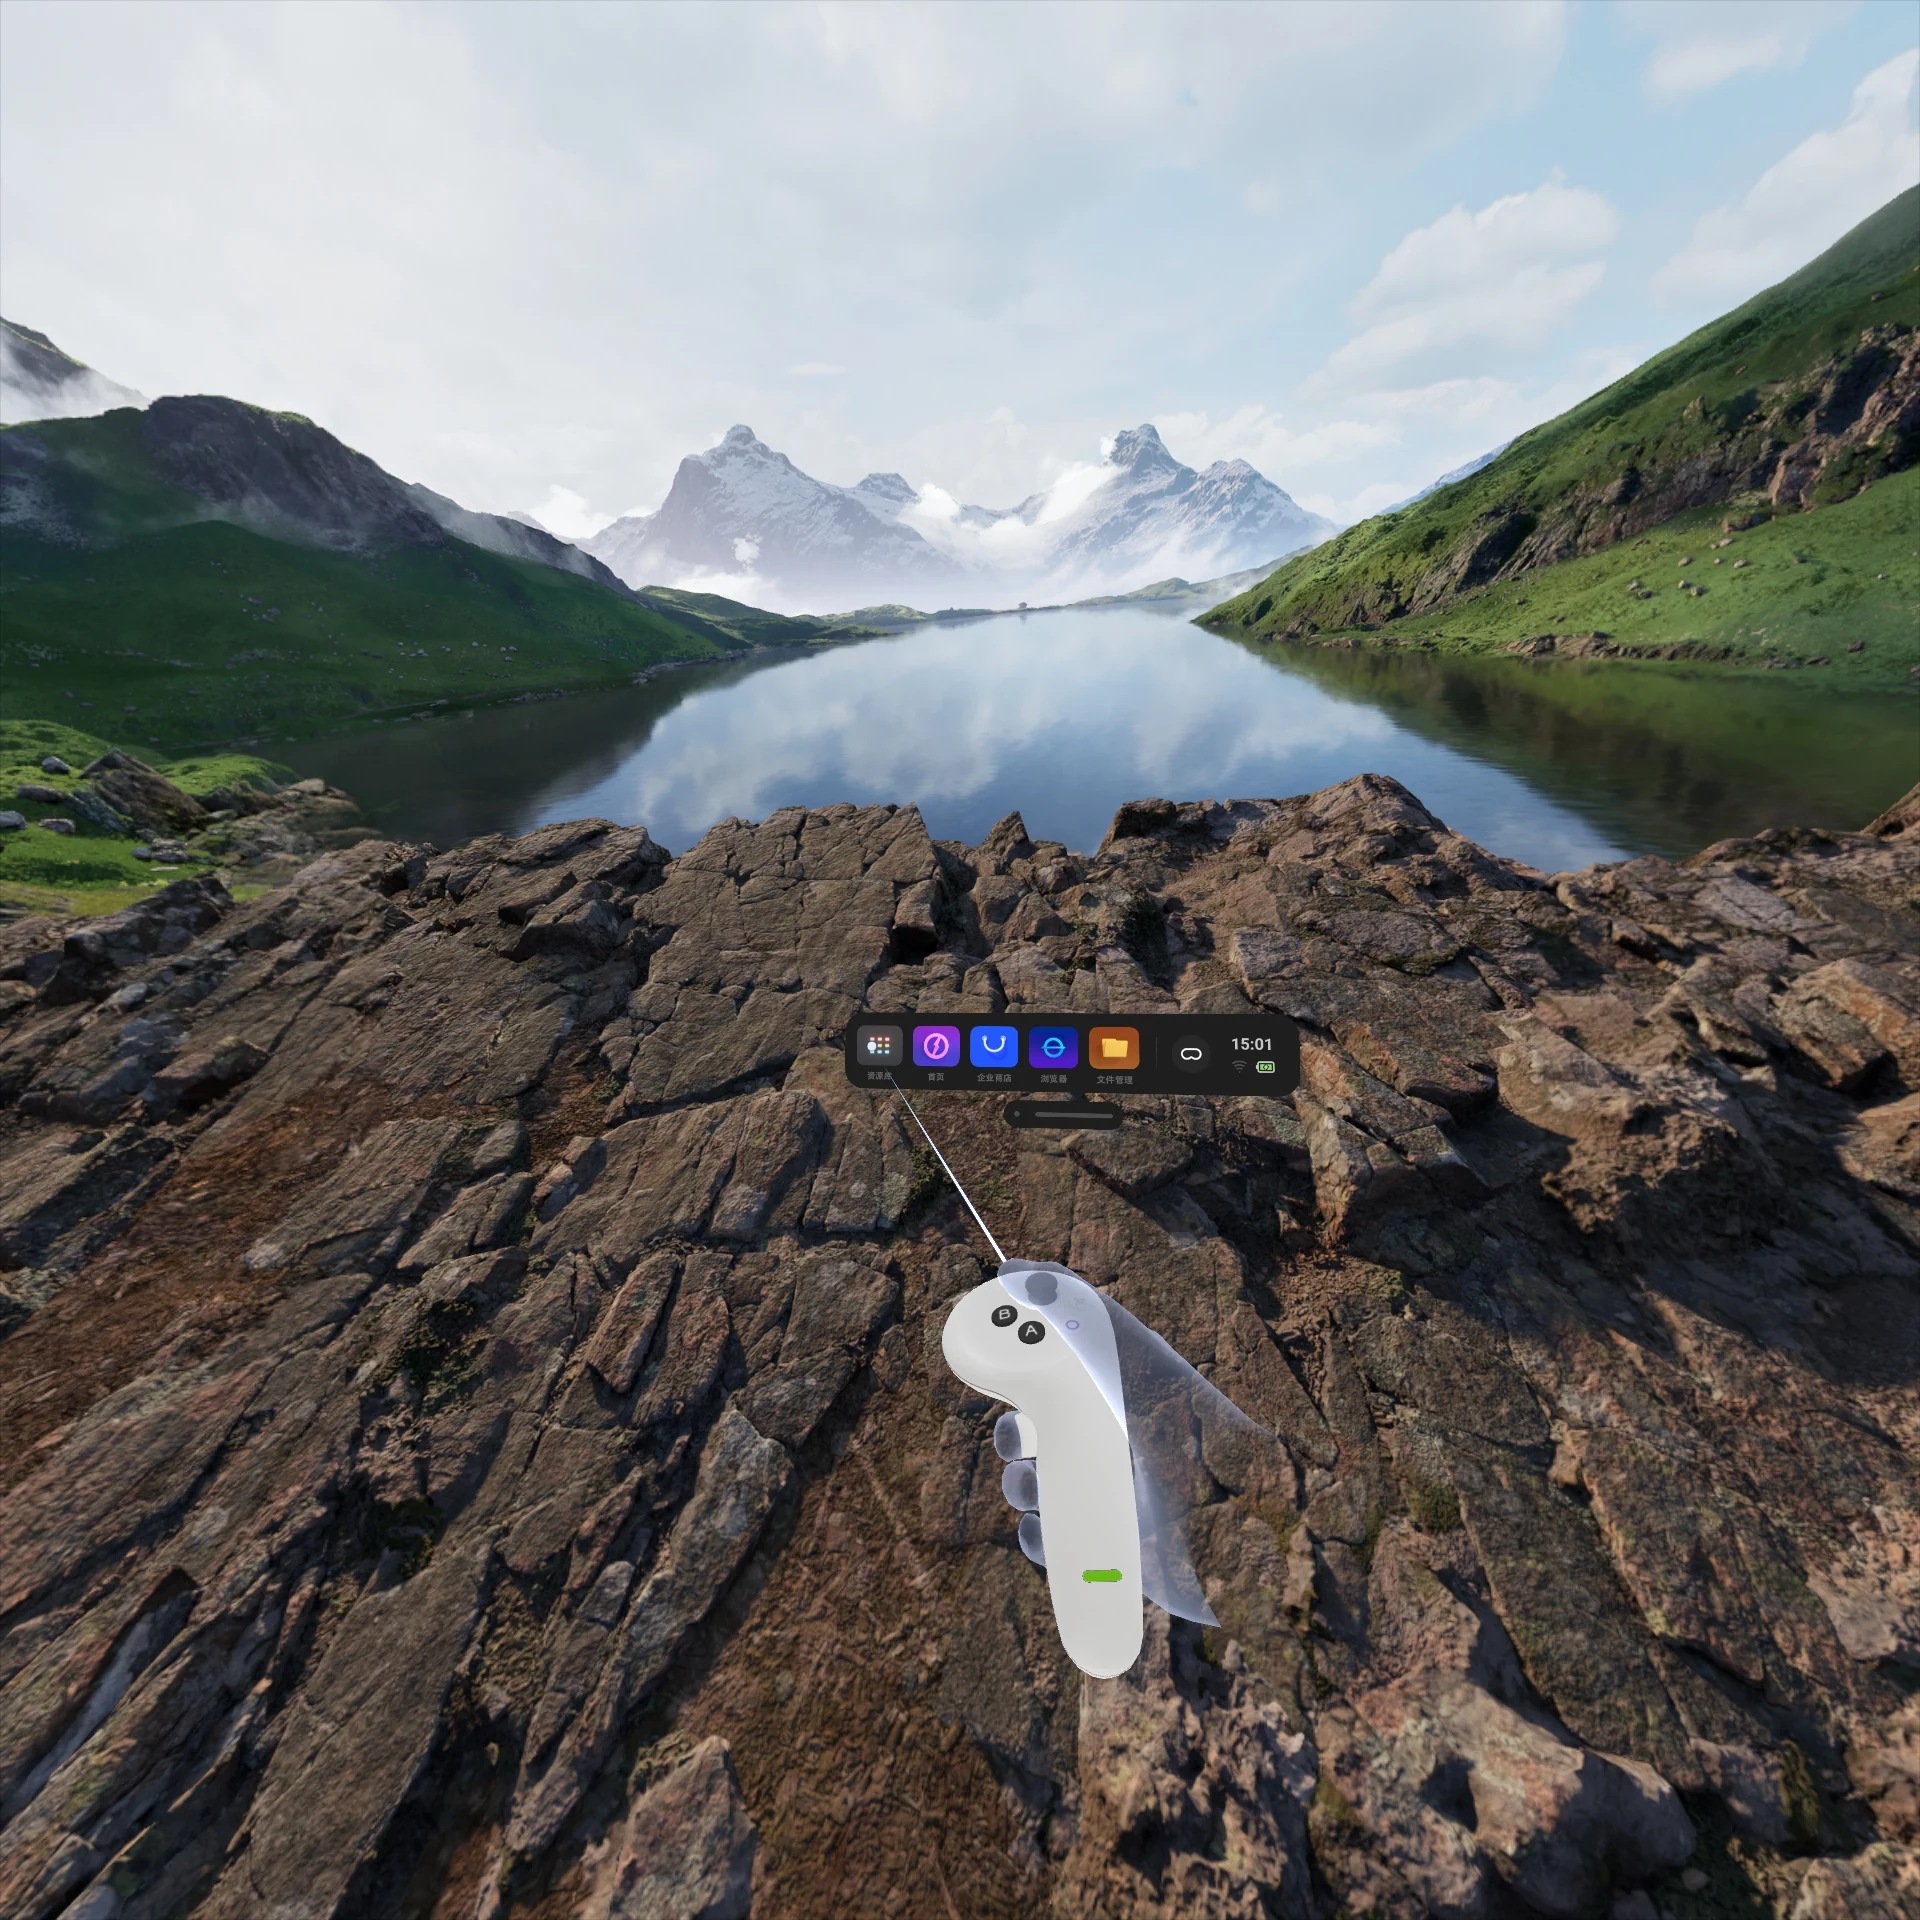
Open Library from the VR taskbar
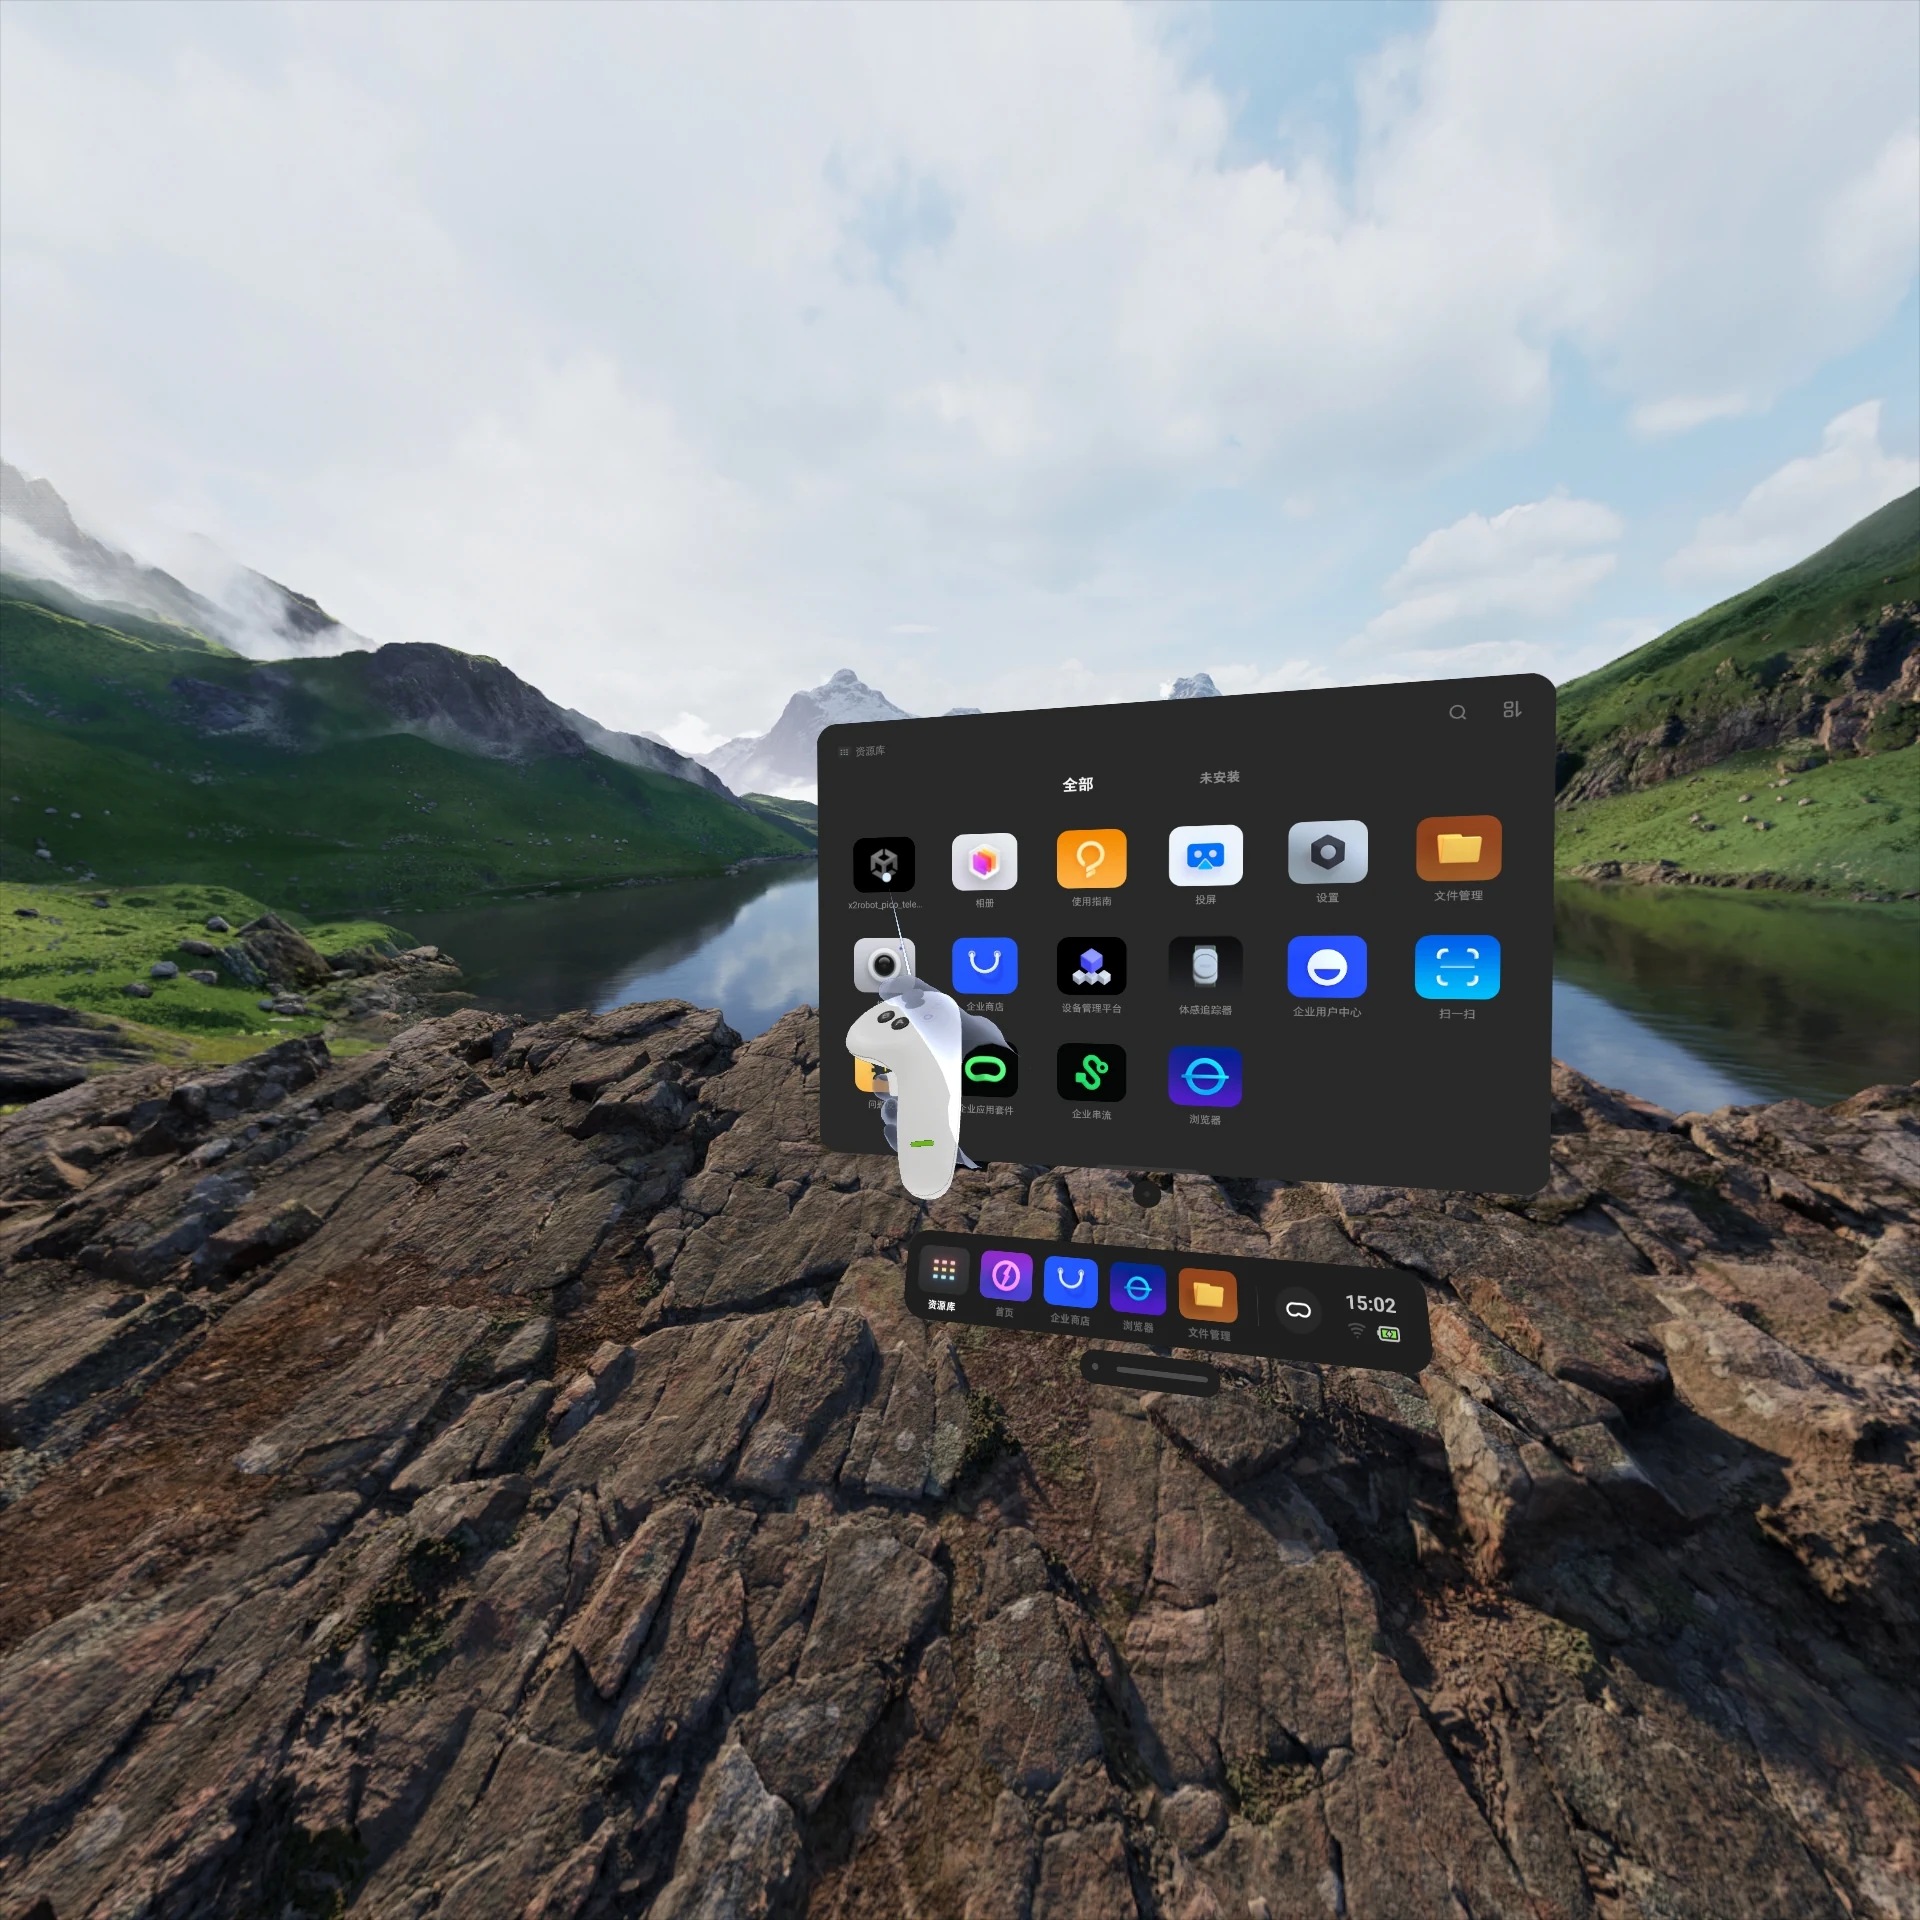
Select Unknown Sources in the VR Library
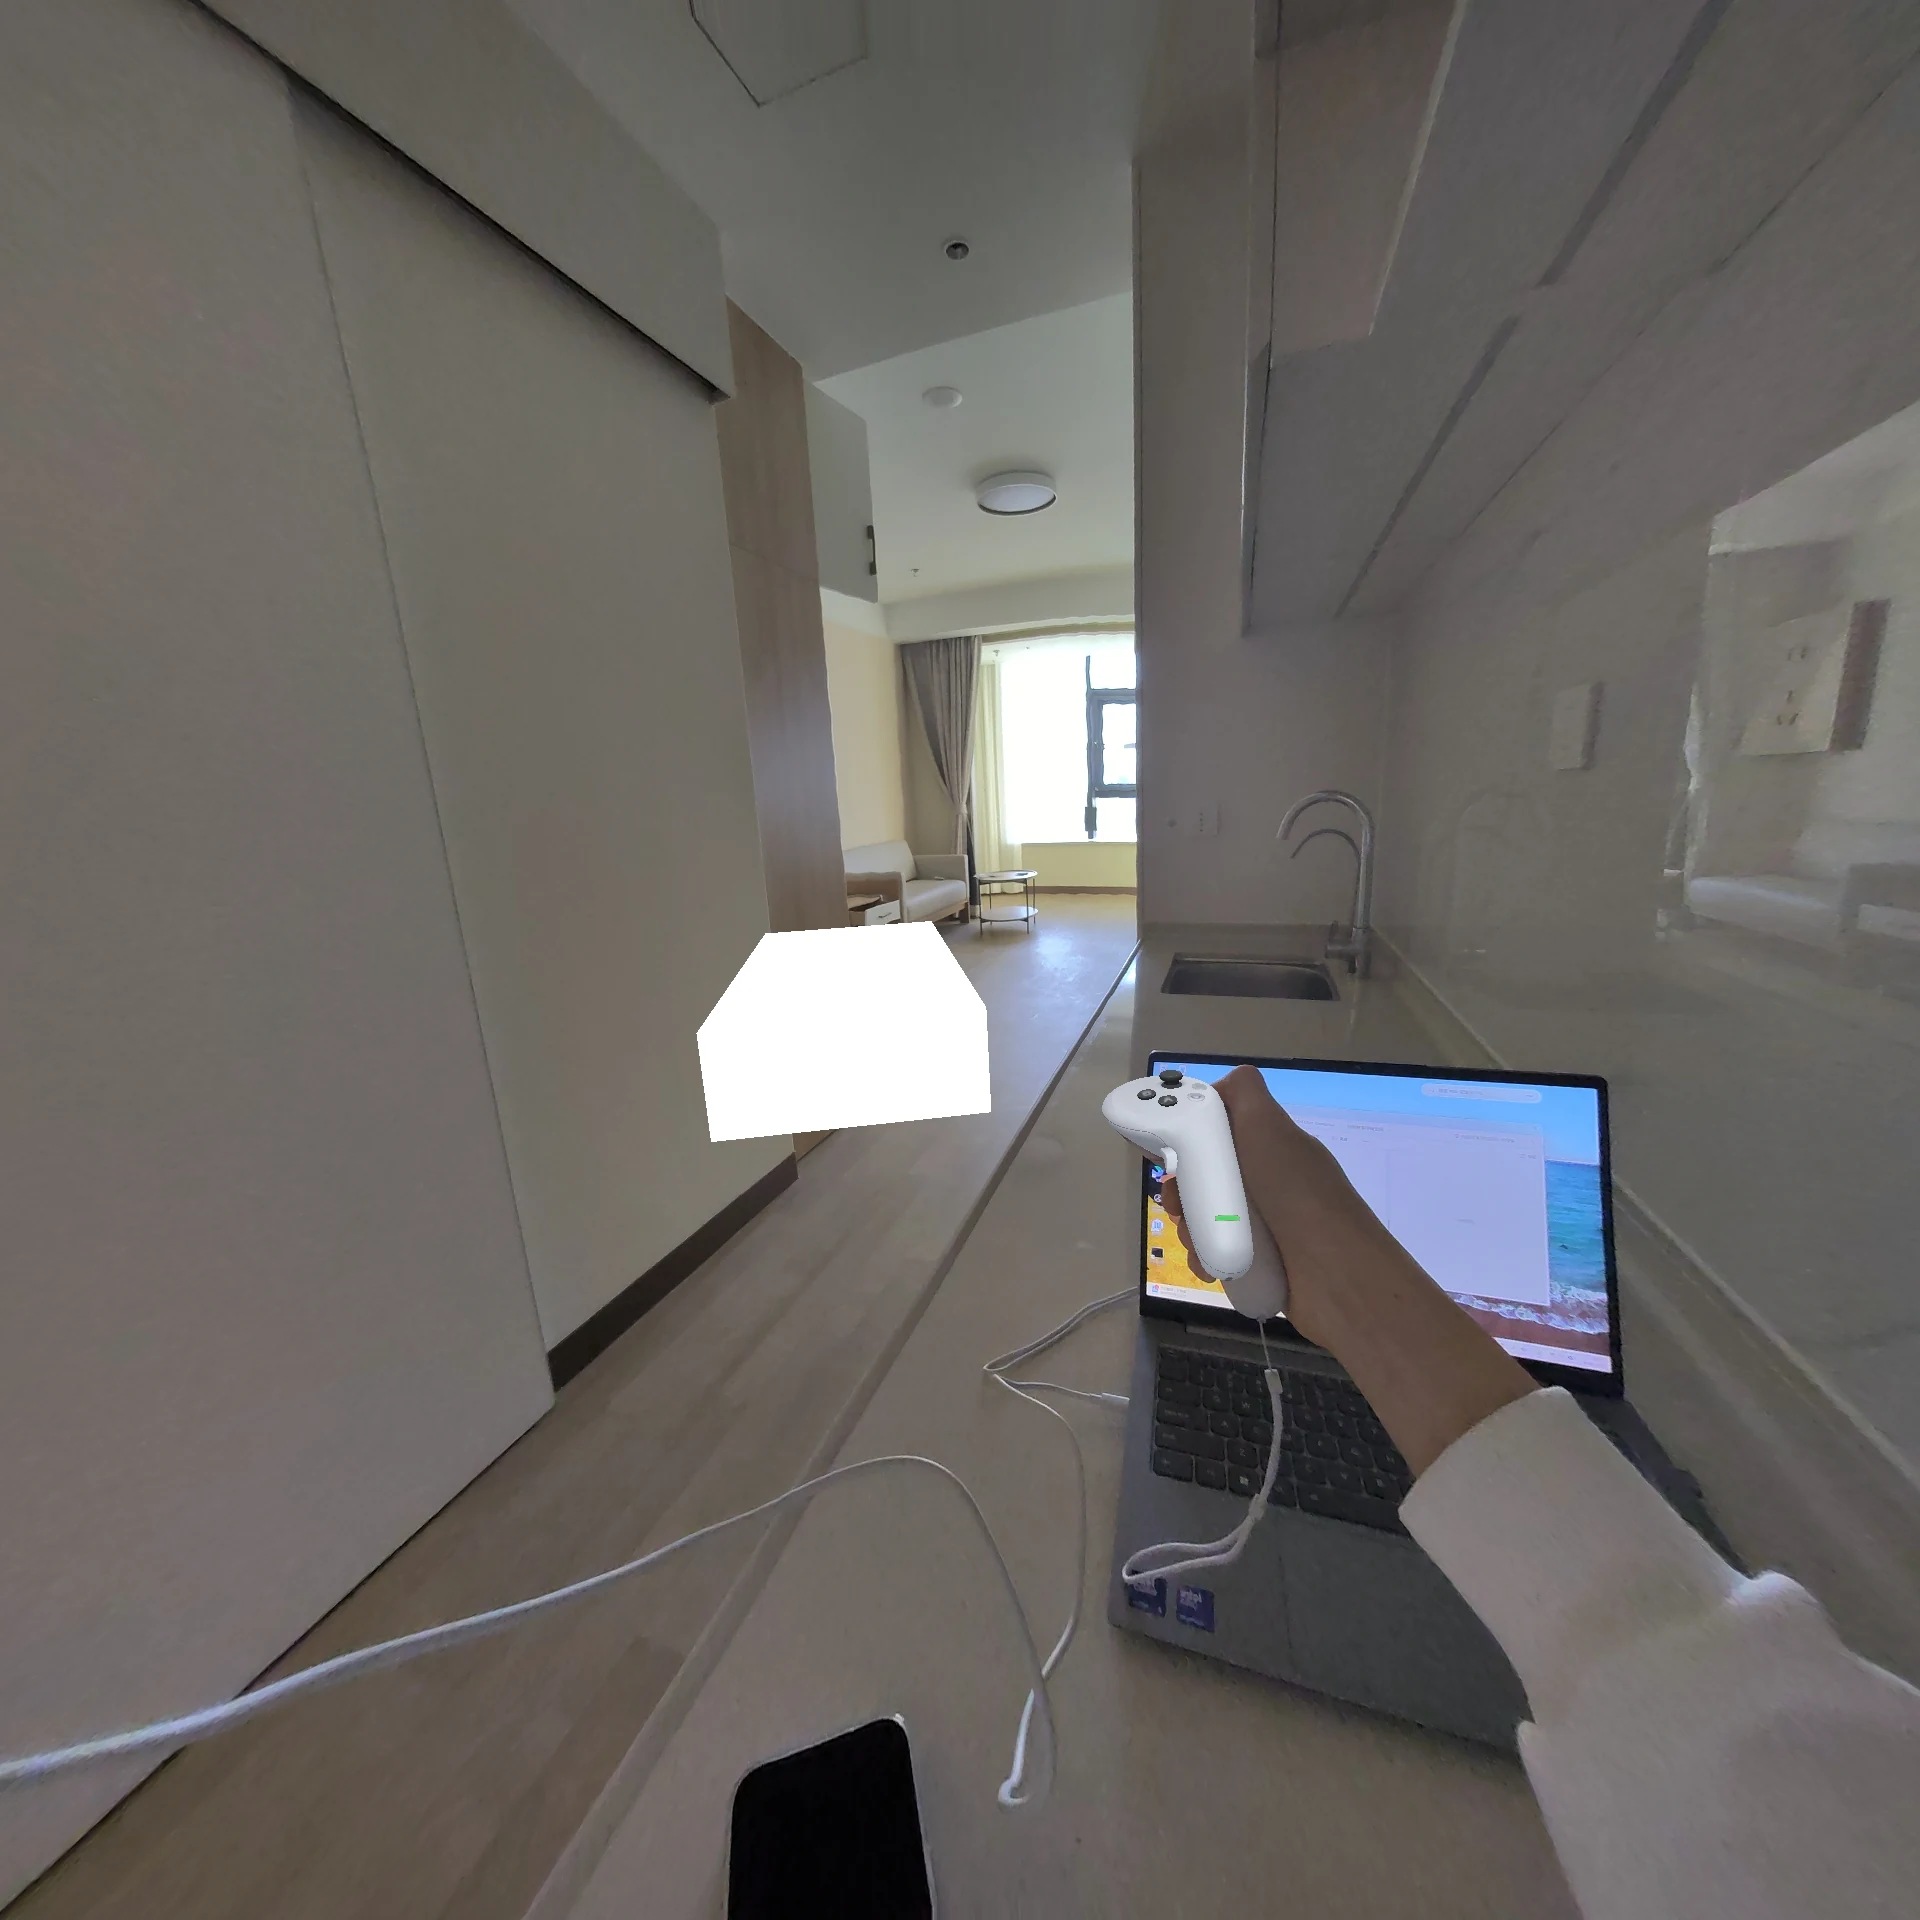
Launch the VR teleoperation application and wait for the connection
-
Click "Unknown Sources" in the upper-right corner of Library.
-
Find and open the x2robot_pico_teleop application. Wait a few seconds until a white square appears on the screen.
-
Return to the WebUI and confirm that the VR device connection status is green.
-
In idle mode, click "Start Teleoperation" to establish a master-slave connection.
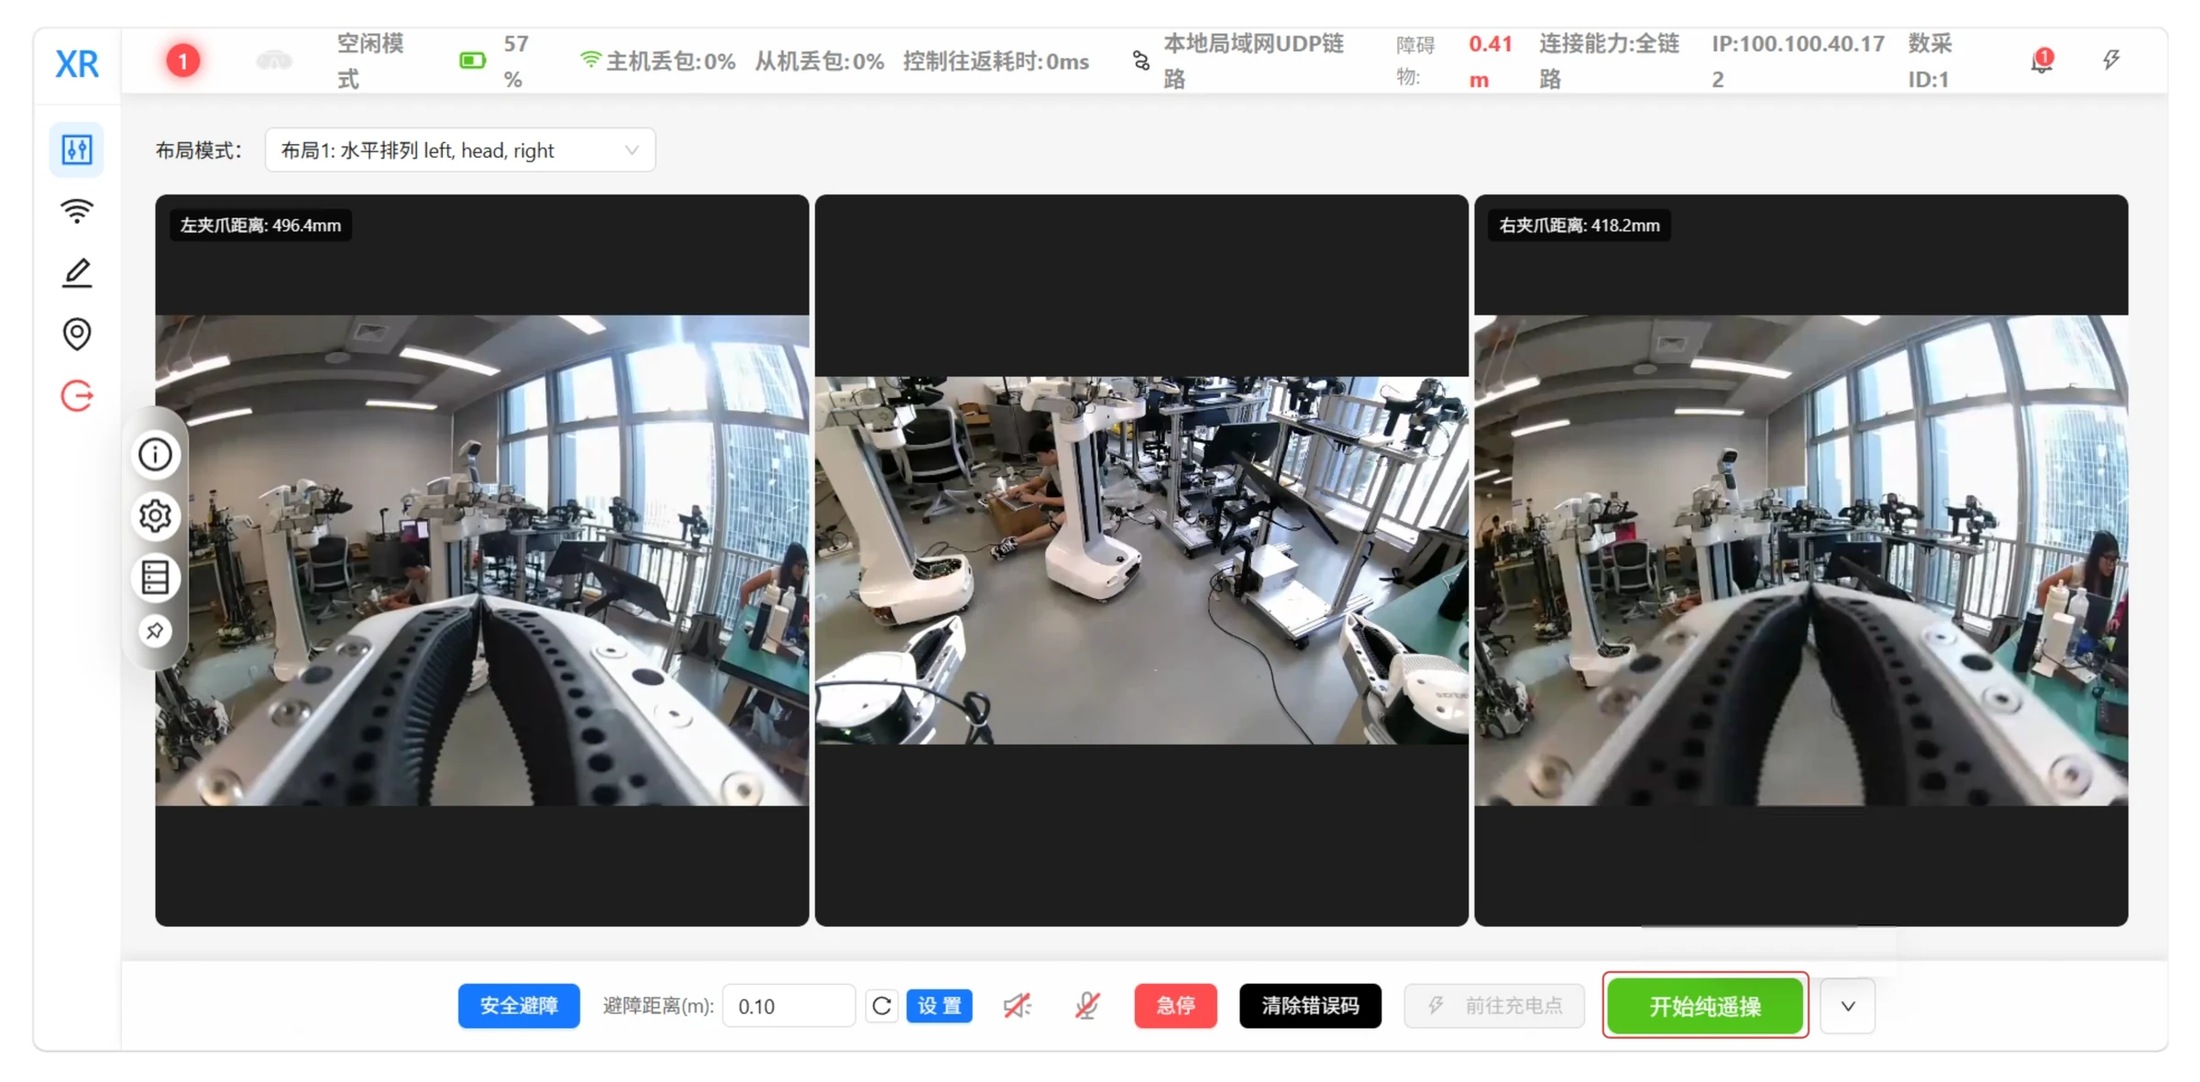
Start VR teleoperation in the WebUI
Controllers and Buttons

Left VR controller

Right VR controller
| Operation | Action |
|---|---|
| Press the B button on the right controller twice | Starts/stops engage/disengage control of both arms, with the left and right controllers controlling the left and right arms respectively |
| Press and hold the B button on the right controller | Starts/stops data recording |
| Left joystick | Controls head movement: push up to pitch up, push down to pitch down, push left to turn the head left, and push right to turn the head right |
| Right joystick | Controls chassis movement: push up to move forward, push down to move backward, push left to turn left, and push right to turn right |
| Front lower buttons on the left and right controllers | Control opening and closing of the left and right grippers: press and hold to open the grippers, and release to close them |
| Button combination | Hold A while pushing the left joystick: push up to raise the waist, and push down to lower the waist |
| Side button | Pauses robotic arm teleoperation; when pressed, the robotic arm no longer follows the controller's pose |
VR Operating Precautions
-
Rest the headset around the operator's neck and keep both controllers within the headset's field of view at all times.
-
Avoid large hand movements when pressing the B button twice to enter takeover mode.
-
Before leaving, you must press the B button twice again to exit takeover mode and wait for the robot to return to its zero position.
-
Do not set down the controllers while in takeover mode, as this may cause abnormal robotic arm movement or equipment damage.
End Teleoperation
-
Stop the current data recording.
-
Exit robotic arm takeover mode and wait for the robot to return to a safe pose.
-
End teleoperation mode in the WebUI.
-
Confirm that the robot has stopped before disconnecting the VR device, master arm station, or network connection.
If you are also collecting data, continue to the Data Collection Guide.